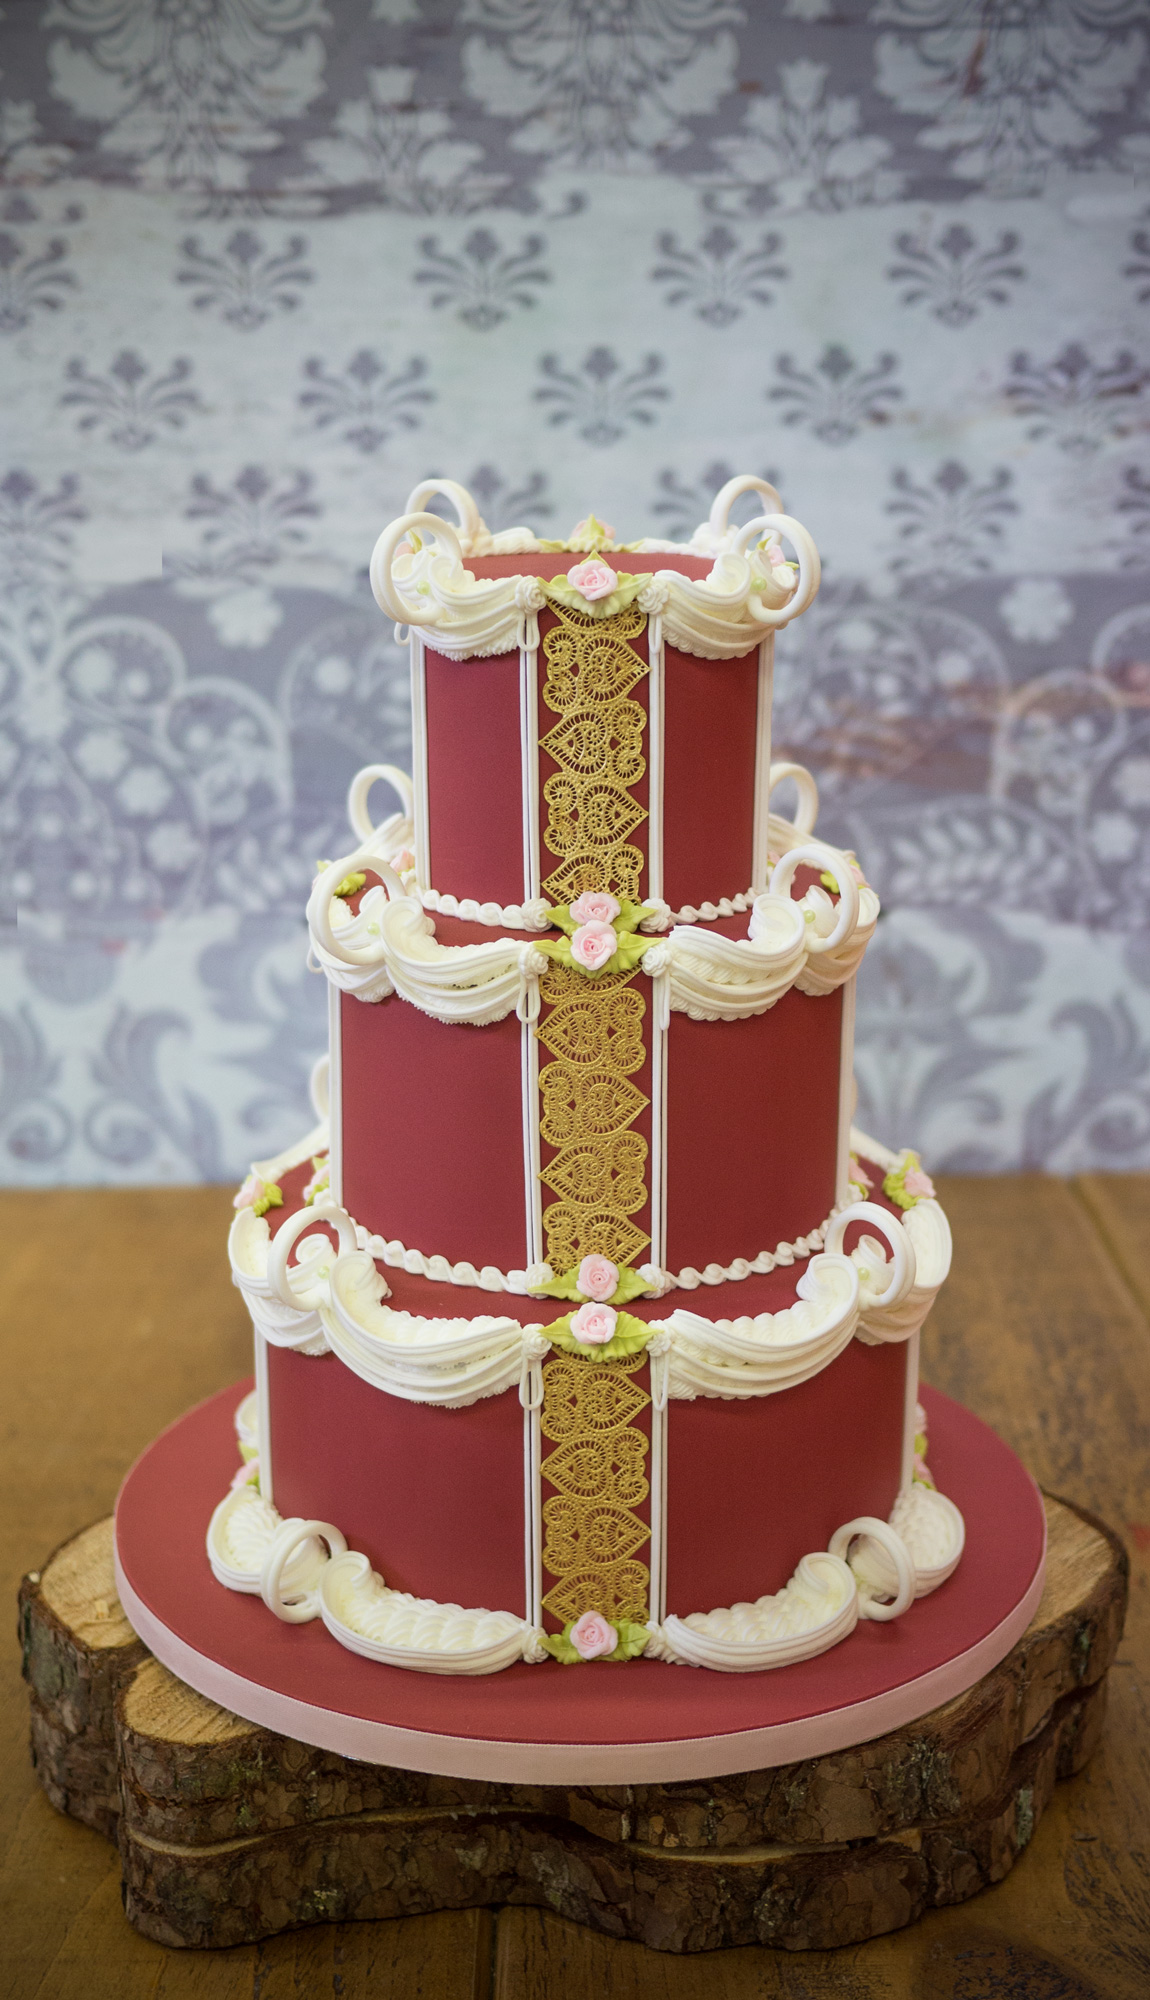
Tutorial Preview
Highlights
If you are struggling to find the time to watch each and every lesson then this is the video for you. Here we have selected all the key points and condensed the whole tutorial into 10 minutes…more than enough to get you started!
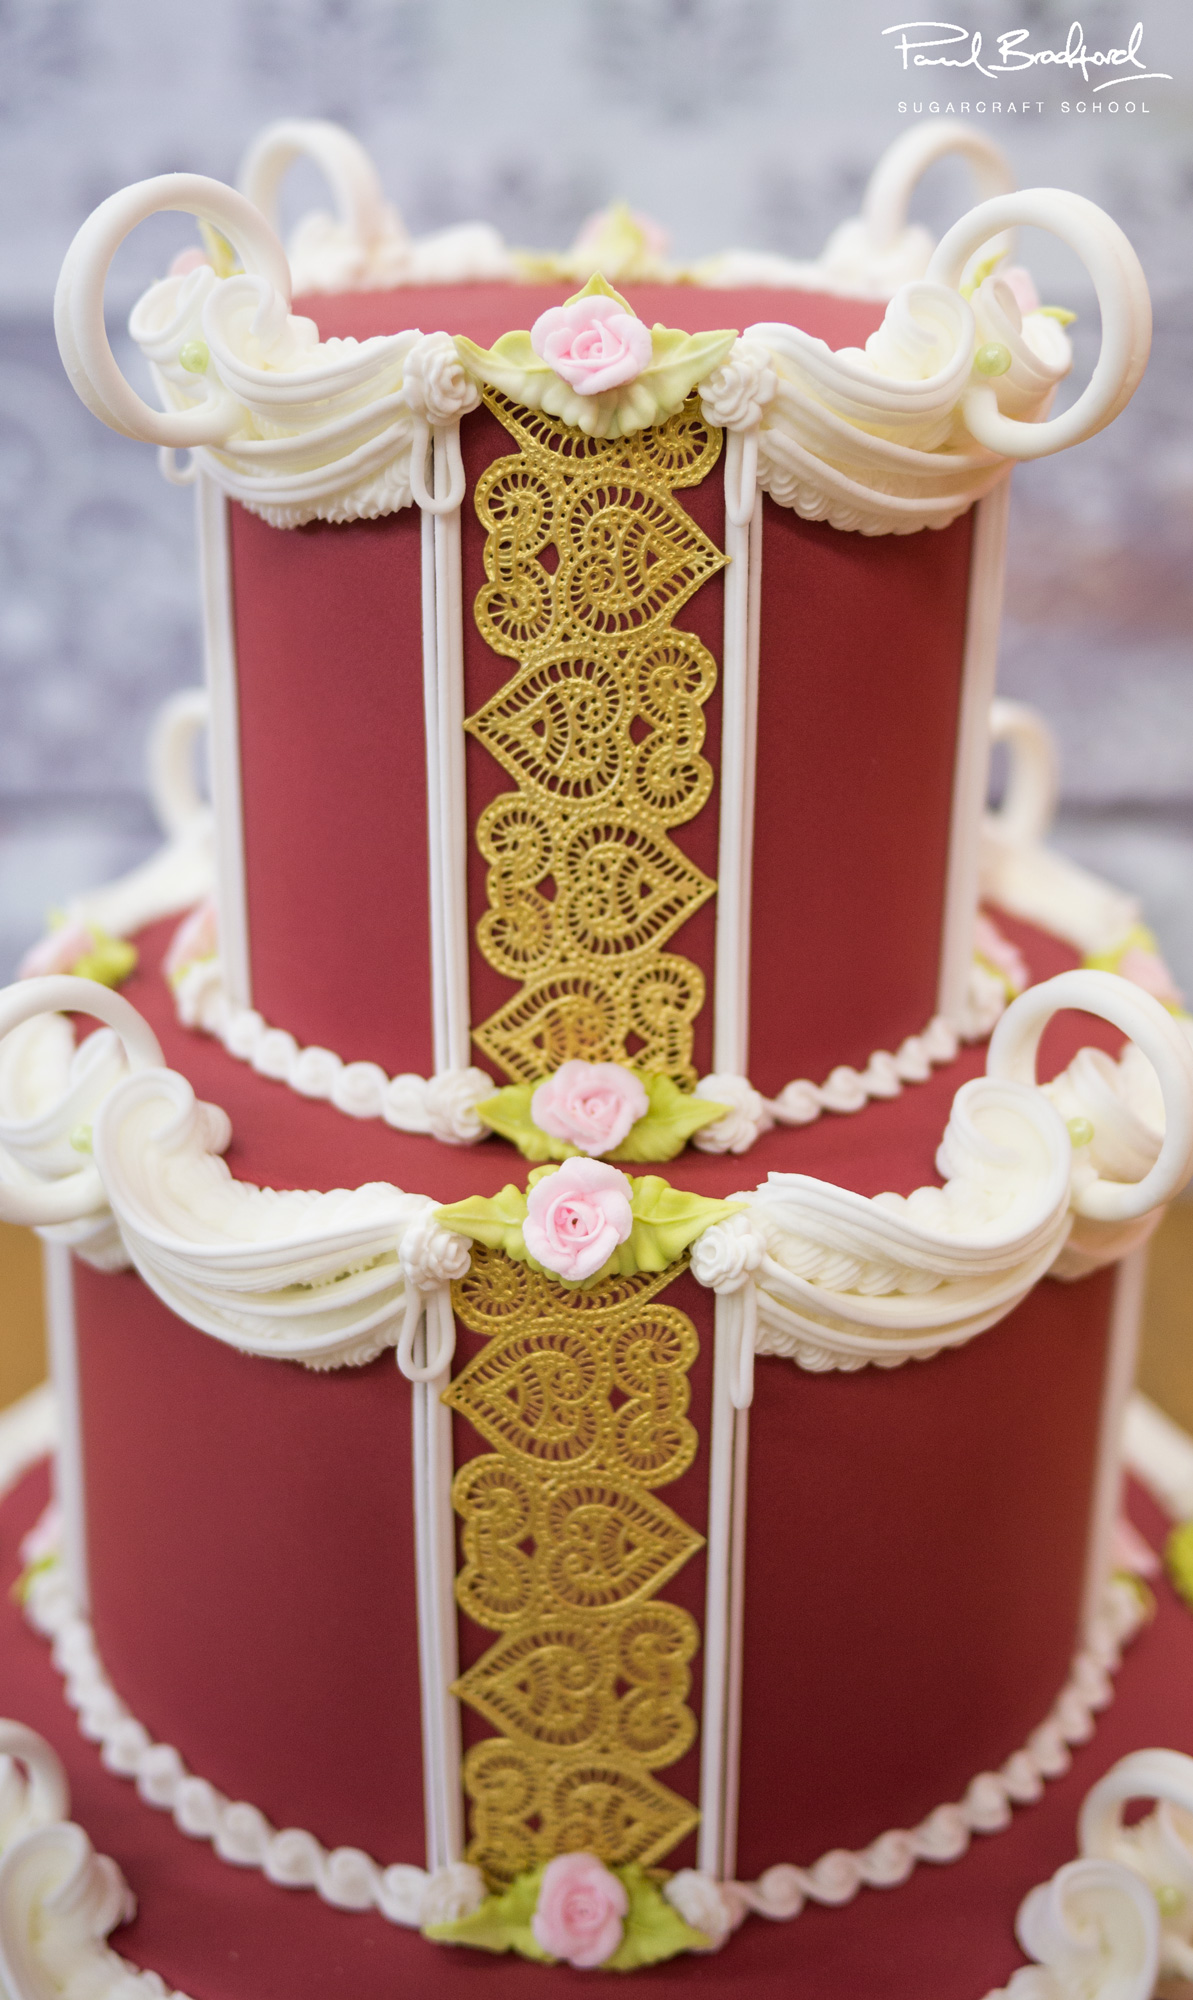
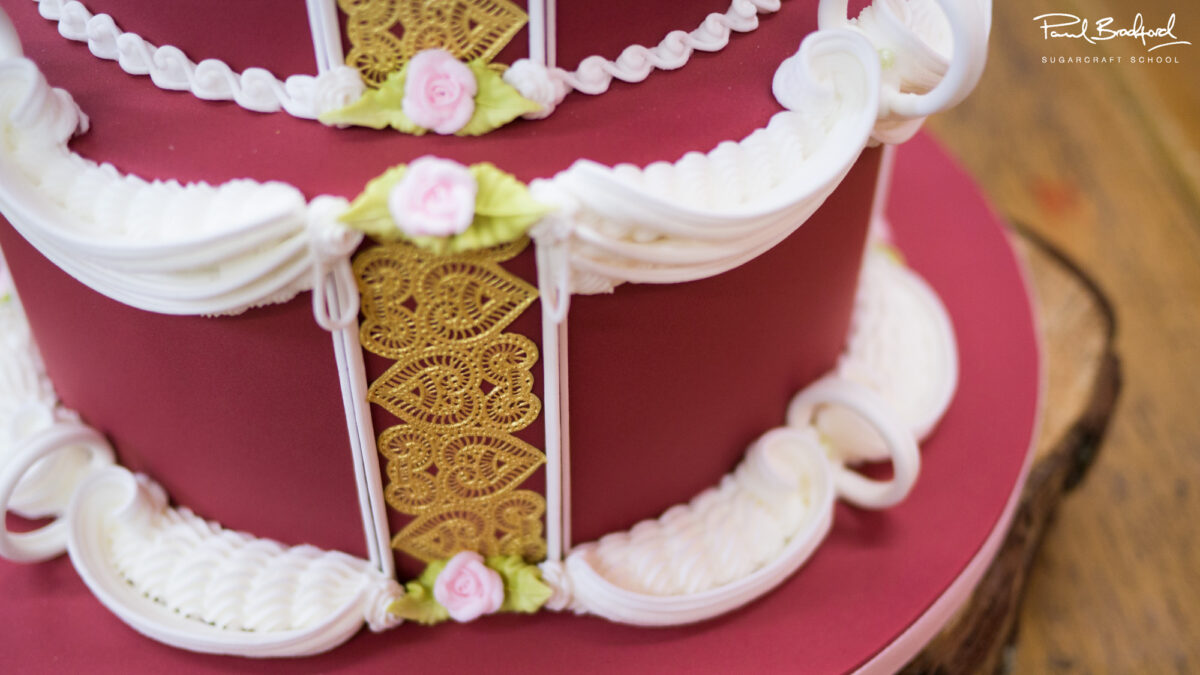
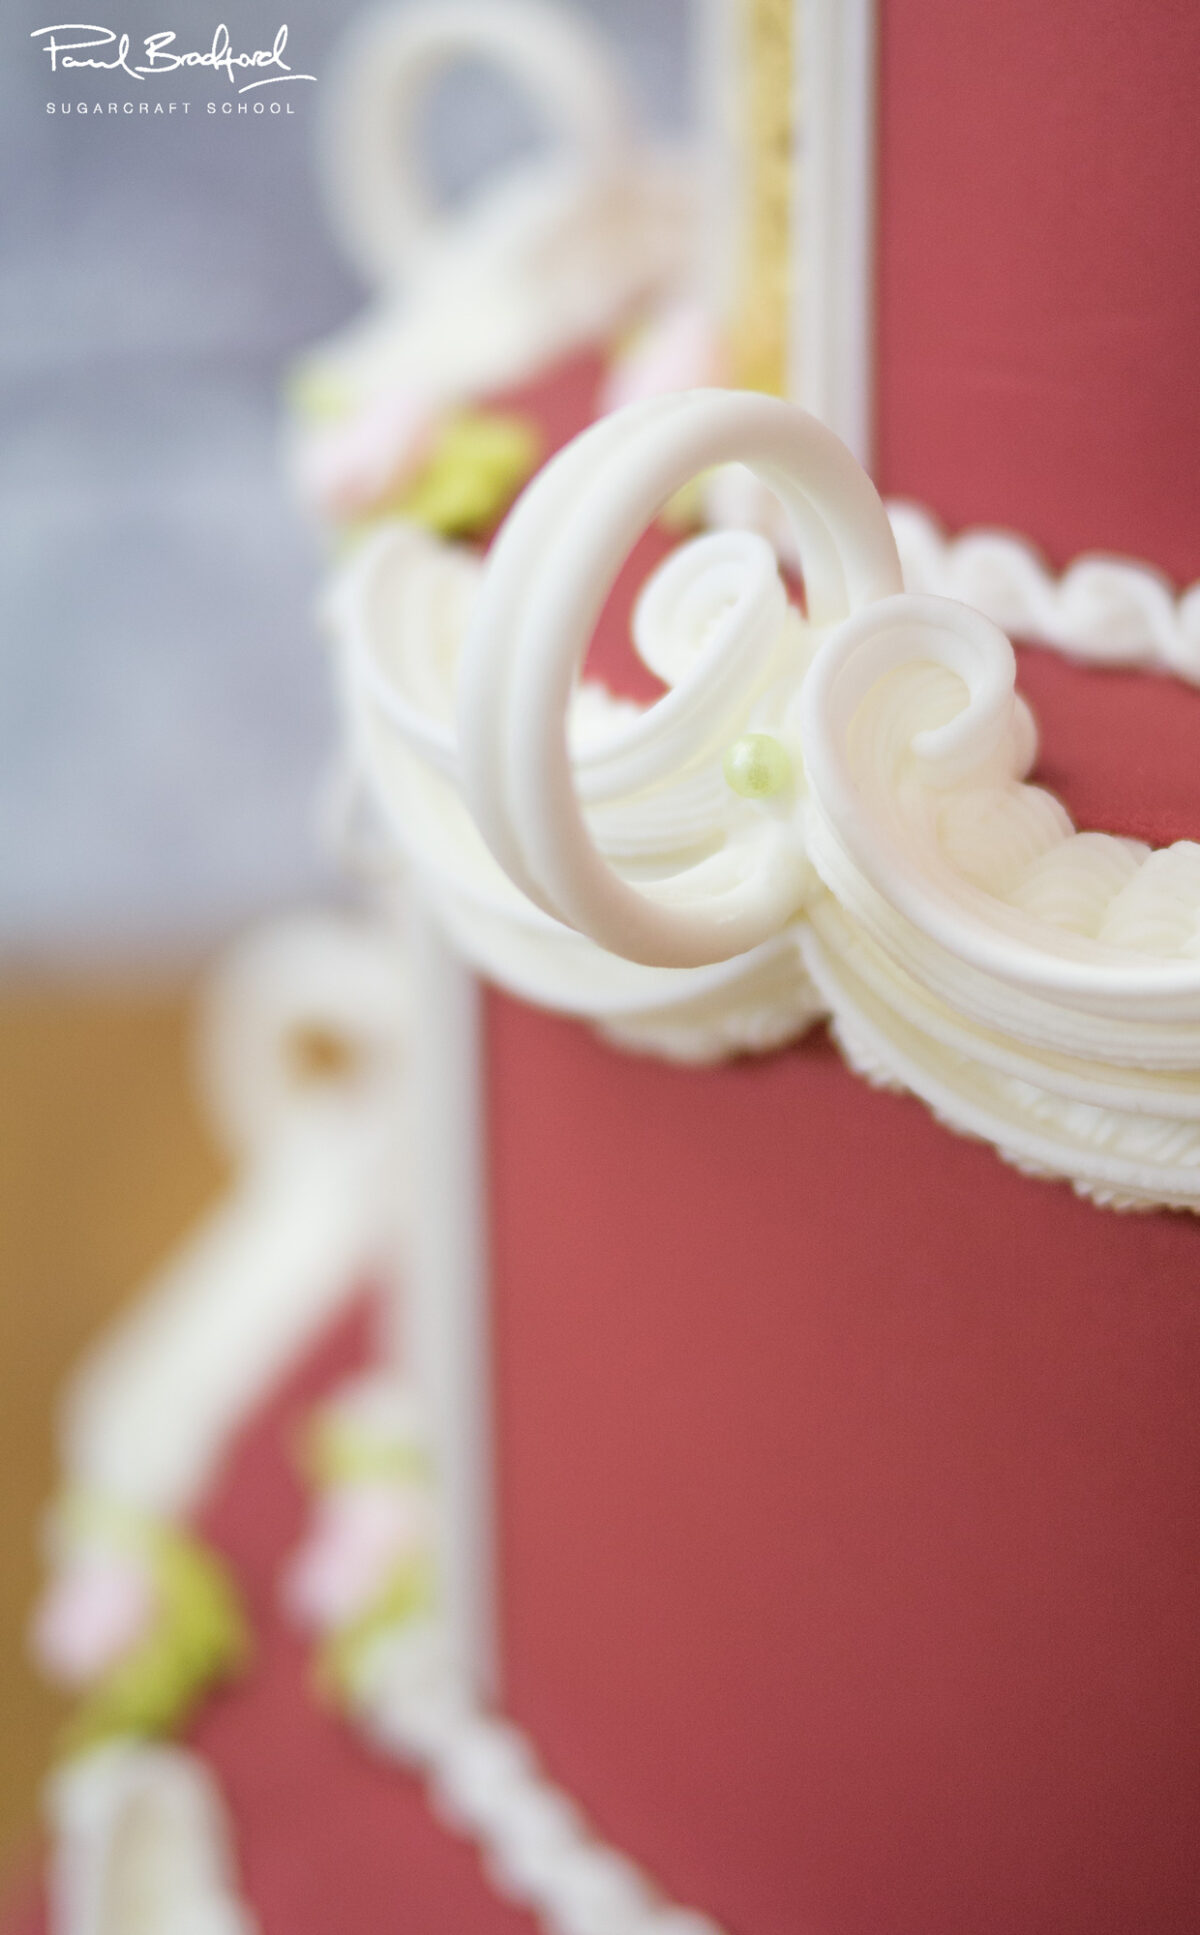
1. The Lambeth Shell Hoops
Ceri starts us off by showing us how to make the first of the off pieces which will be the lambeth shell hoops and Ceri has been kind enough to supply you with a template to keep things nice and simple for you. All the templates can be found in the templates section.
2. Preparing the Cake Lace
In this lesson Ceri shows us how to prepare cake lace and he’s full of useful tips to make the whole process as tidy and easy as possible. Ceri advises leaving the cake lace overnight as this will ensure it is ready without any difficulties but even 4 hours in room temperature should do it. You can do it in the oven but you may run into some difficulties as it can be very temperamental depending on moisture in the air and so on so it’s always best to plan ahead.
3. Toothpick Roses and Moulded Roses
Sounds frightening doesn’t it? How do we make roses that can fit on toothpicks?! Well Ceri is here to show us and it is actually a lot easier than you may think (or at least he makes it look easy). Ceri advises that you use the stiffest royal icing you can comfortably work with. Simply small movements while spinning the toothpick between your fingers is what it’s all about. Then it’s onto using rose moulds using with a 50/50 mix of sugarpaste and flower paste and a little corn flour.
4. Cake Mapping
The most important process of piping onto a cake is cake mapping. Not only should you have the design planned out in your head but you should also map it out on the cake so you can follow your design as precisely as possible. Ceri shows us how to do this using parchment (tracing) paper a ruler and a pencil and a few pins. Just a few minutes of your time and it will make your life so much easier!
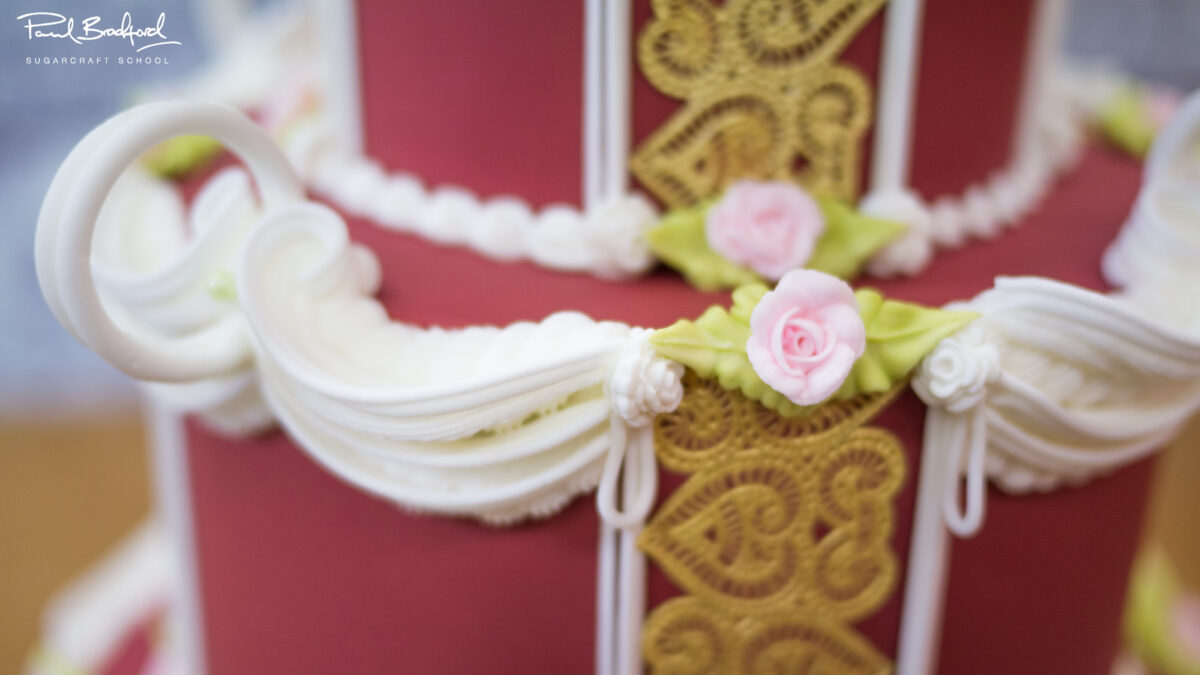
5. Vertical Line Work
In this lesson Ceri begins to add some piped scoops, shells and “S” shapes and the prettiness begins to form! From here on Ceri will be building on top of the piped work bit by bit to make it more and more complex. Remember and keep hold of the little rectangle template you cut out for the vertical lines as you will need it again when cutting your cake lace.
6. Adding the Cake Lace
Now that the cake lace is ready it’s time to stick it on to the cake. Ceri uses a little spray bottle to safely apply moisture to the back of the cake lace which is less likely to damage it. Cake lace is very fragile when water is applied to it so be very careful and don’t over spray. As well if you run into issues where it breaks and so on you can actually put it together like a jigsaw and cut bits together to form one piece.
7. Building up the Borders
In this lesson Ceri starts adding piped shells and the rings that we made earlier which should be well set and hard. We learned the hard way during this section that boiling the kettle for a nice cup of tea in the same room as where you are doing your piped work can be a bad idea. After a few cups of tea the moisture in the air had an adverse effect of the royal icing and cause Ceri some difficulties so maybe bare this in mind.
8. Stacked Line Work
Ceri continues building on the piped work by adding stacked line work on top of the shells and borders etc. Ceri is using soft peak royal icing and as always has his damp paintbrush to hand to help neaten his work as well as remove bits that haven’t worked. You’ll notice that as he jumps between nozzle sizes that he has dedicated bags for each nozzle which are marked with the nozzle size. This is a great working practice and keeps everything nice and organised.
9. Finishing Touches
In this final lesson Ceri adds some pretty 4mm green dregees secured with a little bulb of royal icing. He then goes on to pipe draped and twisted loops, piped leaves and the roses made in the rose moulds. The finished cake looks absolutely beautiful and in the next lesson Ceri gives some other ideas we can use when making this cake.
10. Other Ideas
Ceri shares some ideas that you can implement when making this cake to make it unique to you. We would love to see your versions of this cake so please share your pictures with us on our Facebook Page!
11. Pro Lesson
Paul gives some insider information for this cake including the cost to make it as well as how you should price the cake when selling it – vital information for any professional cake designer!
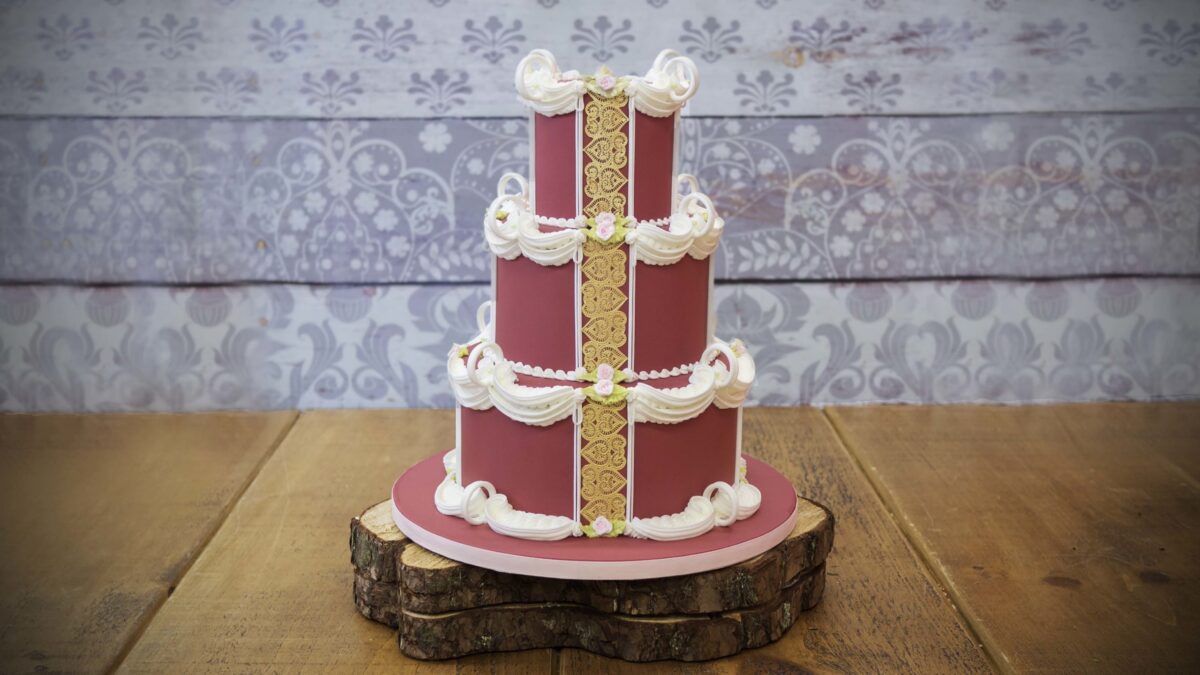
Ceri introduces us to his stunning Ruby Red Wedding Cake which is full of fantastic piping techniques that can be used time and time again. This cake is perfect for a special occasion and can be adapted in so many ways making it a great cake to add to your library of designs.
We would love to see your take on the Ruby Red Wedding Cake – please share your pictures with us on our Facebook Page!