Tutorial Preview
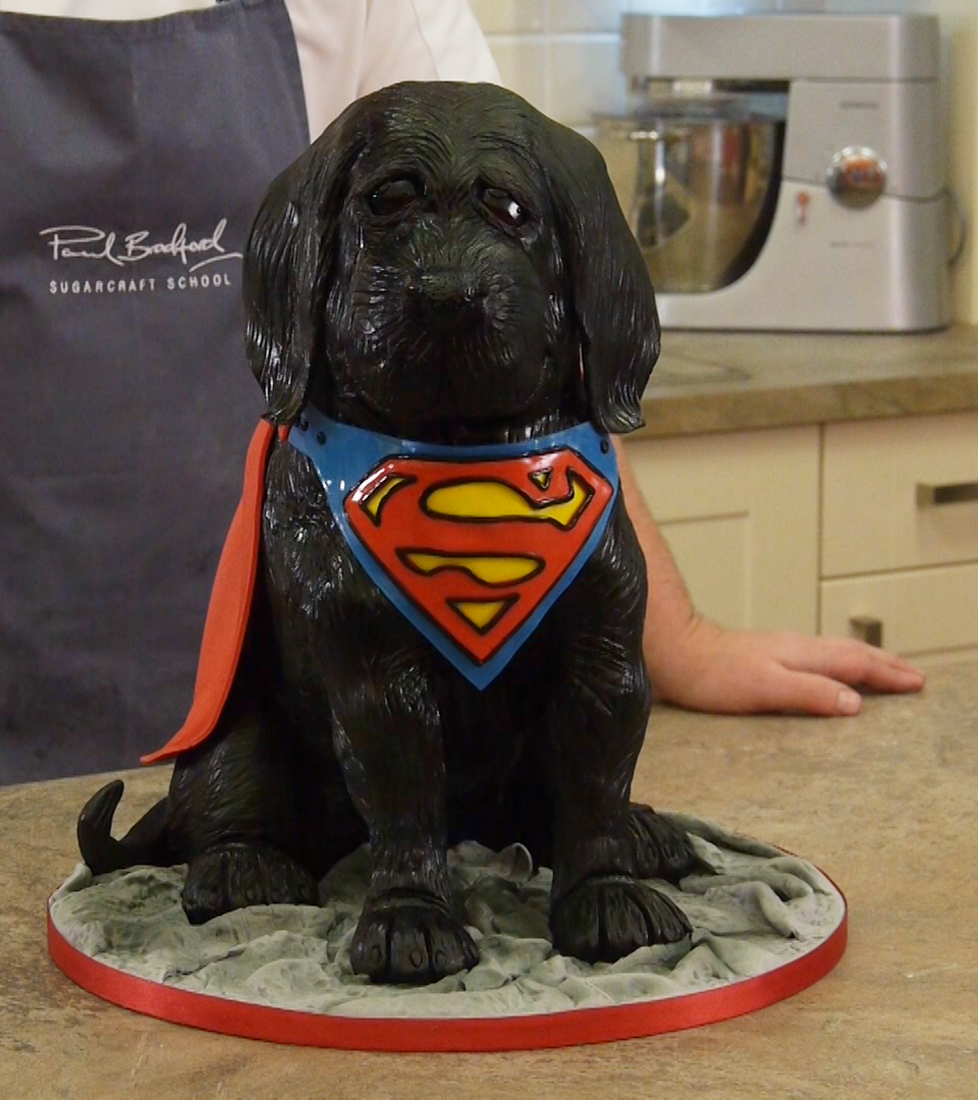
3D Dog Cake | Superdog
with Paul Bradford
Skill level:
Intermediate
HD Lessons:
28
09:09
1. Building the Stand
The cake is supported by a wooden structure that keeps everything upright and strong. You will need to use power tools for the creation of the stand (or ask for help at your local DIY store or carpenters). There is a template provided for the top section shape, which can be downloaded above.
06:22
2. Stacking the Cakes
We use 2 x 8″ square cakes for the edible section of the 3D dog cake. You can use the same template as the one for the stand to help carve the cakes in separate sections. Ganache will hold everything together securely with the bonus of a tasty, luxurious filling.
06:06
3. Carving and Ganaching
The built up cake structure can now be carved into a more curved shape to resemble the dogs back. Don’t worry about the front of the dog at this stage as this will be created using modelling chocolate and sugarpaste in the next lesson. The carved cake can now be covered with ganache. Paul uses an extra thick layer to ensure the cake is strong enough to be transported.
13:26
4. Creating the Front
A mixture of modelling chocolate and sugarpaste is perfect for the front of the dog. Multiple layers should be added to build up to the final shape and you can attach these using ganache if necessary.
18:29
5. Icing the Front
Using some clever measuring tricks, icing the front of the 3D dog cake will neaten everything up and keep things in place. Try to blend any overlapping sections and trim away any excess sugarpaste as shown.
04:31
6. Creating the Fur Effect
Before the sugarpaste dries, it makes sense to add the texture and fur effect to the front of the dog use the PME quilting tool or similar. Use some pictures (or an actual dog!) for a reference on which direction to texture the fur.
26:20
7. The Back Legs
To give a more puppy like look to the dog model, Paul adds a slightly bigger belly using the 50/50 sugarpaste modelling chocolate. The creation of the back legs is covered in detail in this lesson.
13:18
8. The Body and Front Legs
Using white sugarpaste, rolls of puppy fat are added to the model and blended in. These are also textured using the same method as the front of the dog, with the PME quilting tool or similar. Shaping of the front legs and texturing is also covered in this lesson.
06:33
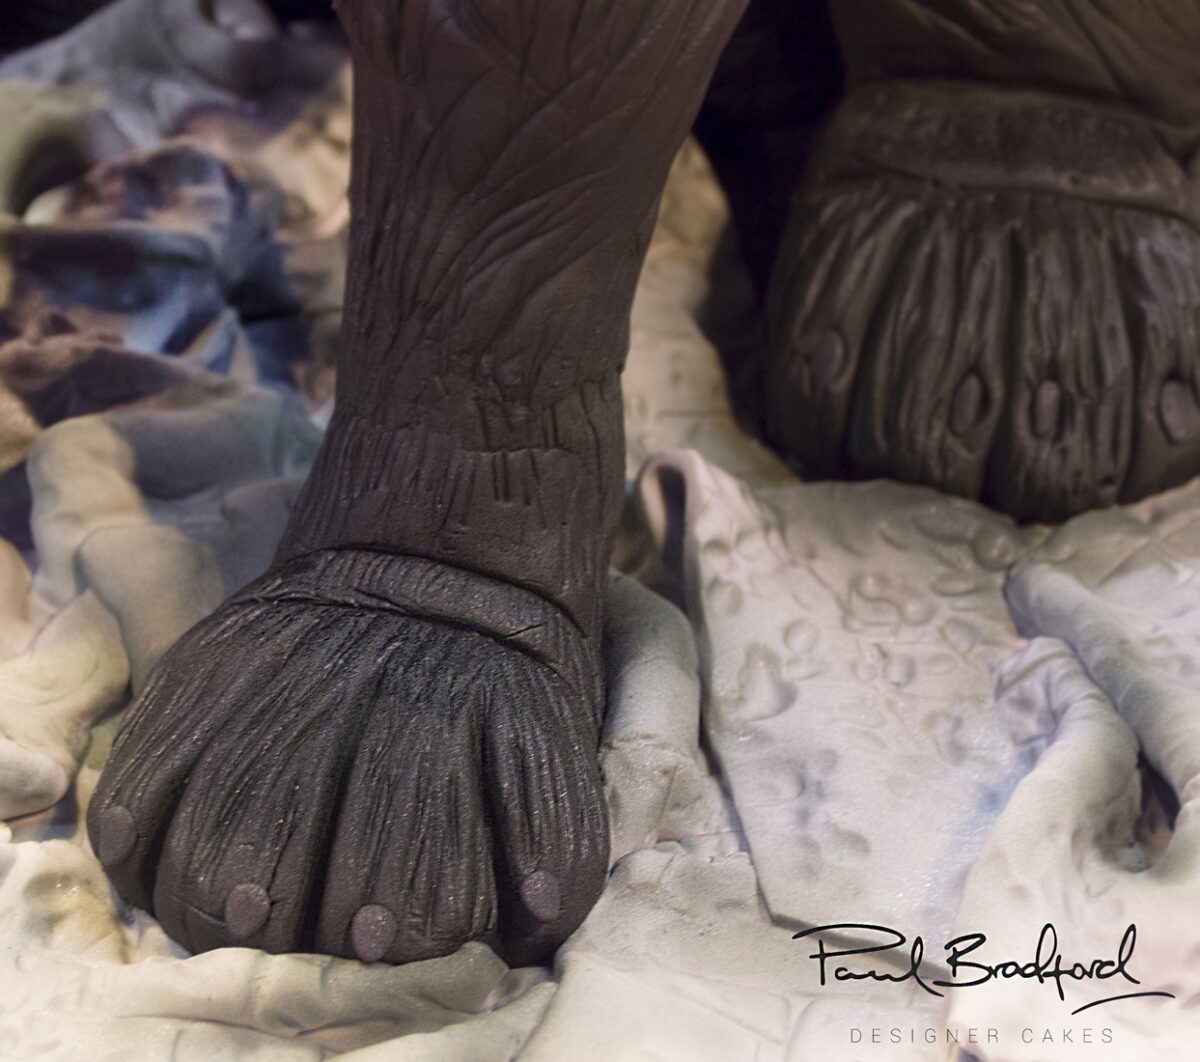
9. Front Paws
Both of the front paws should be created at the same time to ensure the size and shape match. Try to get a nice neat shape and finish, as these paws won’t be covered over again (except for airbrushing).
04:29
10. Making the Head - Part 1
The head is made using a polystyrene cut out in a profile view of a dogs head (Paul explains how you can measure and create the head). Be careful with the amount of polystyrene mess you’ll get during cutting – it’s advisable to have a separate polystyrene cutting room.
04:19
11. Making the Head - Part 2
After a lot of cleaning, the head is shaped to give a more natural and realistic look. It’s possible to use rice crispy treats to build up the head but to avoid using such a mish mash of ingredients Paul sticks to using the sugarpaste mix.
09:14
12. Icing the Head
With the head built up it can be covered in the same fashion as the rest of the 3D dog cake. This will then be attached and blended with the dog’s body.
09:41
13. Attaching the Head
Cut out a nice area for the head to sit and be prepared to position your dowels so they don’t hit the stand (as Paul discovered the hard way!). We have kept the problems Paul faced in the video so you can be prepared and hopefully avoid the same thing happening.
11:19
14. Detailing the Head
With the head securely attached, the neck section is exposed and has gaps that will need to be filled and built up. Add layers of sugarpaste as shown and follow up with some blending and texturing to hide the joins.
07:52
15. Covering the Head
The head of the dog can now be covered to hide imperfections and to provide the perfect surface for airbrushing the cake.
07:43
16. Texturing the Head
Texture on the head is added to match the rest of the dog’s body. Use the PME quilting tool or similar for this and also add details for the mouth and eye areas.
09:35
17. Creating the Ears
It’s tricky to imagine exactly what the dogs head looks like without the ears – follow Paul’s advice on getting the ears just right and your dog will look amazing! The ears are attached with an edible glue solution. Just smooth everything in nicely so that the joins aren’t visible. Use tissue to help hold the ears in the right before they dry.
07:55
18. The Tail
With some minor additions to the chest of the dog, the tail can be made with ease. A simple tail shaped sausage of sugarpaste/flowerpaste mix is attached and held in a neat flick with the help of some tissue. The nose is also created and attached towards the end of the lesson.
02:51
19. Airbrushing
It’s time to airbrush the 3D dog cake using an edible black paint. Make sure to get an even coat over the entire dog and continue until you have an even black colour as shown in the next lesson.
05:34
20. Icing the Board
As the base shape of the dog on the board is irregular, icing the board with a ruffled effect is easiest. Texture the sugarpaste to your liking, cut out and attach to the board.
13:29
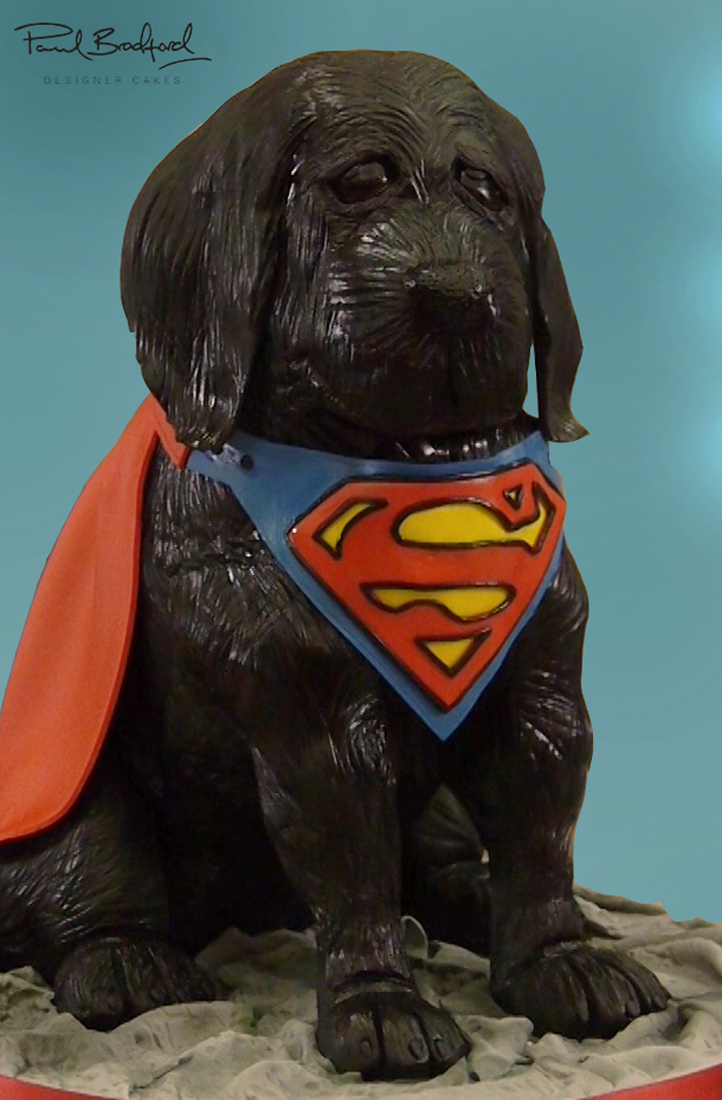
21. Creating the Logo - Part 1
You can find an example Superman logo by doing a quick Google search and then print this and use as a template. Red, yellow and black sugarpaste is used to produce the logo in different layers – just make sure to use a nice sharp knife and work reasonably quickly to avoid the paste drying out.
03:04
22. Creating the Logo - Part 2
The logo can now be attached to a blue piece of sugarpaste. This should be cut out to fit around the dog’s neck, following Paul’s method.
10:26
23. Attaching the Logo
The logo can now be attached to the 3D dog cake (you may wish to leave it to dry for a little while first). This section is not without its little mistakes which we’ve left in, so you can see exactly what to do and what not to do when attaching the logo.
13:16
24. The Ribbon and Cape
What good is a superhero without a cape? Paul creates a red cape using sugarpaste and holds everything in place with the help of some spaghetti.
08:40
25. The Eyes
Almost there! Superdog’s eyes are next and Paul explores different options when painting the eyes. He settles on a different coloured design for the eyes, so check the next lesson first if you’re following along lesson-by-lesson.
06:05
26. Finishing Touches
The finishing touches are added to the 3D dog cake. You may also wish to spray the cake using clear edible spray glaze which gives the cake a brilliant shine.
01:20
27. Other Ideas
Paul shares some other ideas for this cake. We’re looking forward to seeing your take on this cake, so if you do have a go at creating Superdog, visit our Facebook page and share your photos with us!
01:35
28. Pro Lesson
The Pro lesson covers the pricing for the Superdog cake when re-selling through your cake business.
Is it a bird? Is it a plane? Is it a cake? Well actually yes, it’s a cake! Learn to create this dog of steel! The Superdog course is taught by cake superhero, Paul Bradford. This 3D dog cake is perfect for a pet, comic book or film lover and will suit a birthday celebration, retirement and more.