The Chocolate Wrap is an amazingly simple design but gives that all important WOW factor. It can easily be adapted to any occasion and by simply changing the chocolate to white and adding summer berries it gives an equally stunning, but different design.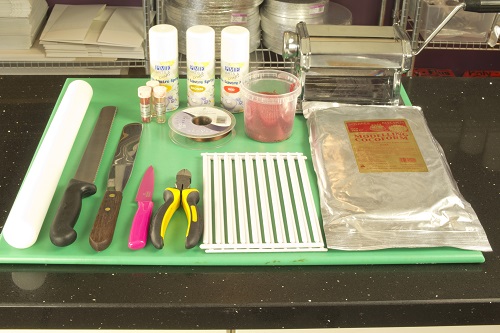
Stock List For Chocolate Wrap
Cakes 15mm, 20mm, 25mm (6,8,10)
Cake Drums 35mm, 20mm, 15mm
Cone 12cm x 30cm high
1.5kg Modelling chocolate/ cocoa form (dark, milk, white)
1.10 meters of 15mm thick brown ribbon
Non-toxic glue stick
Ganache (dark, milk, white)
Dowells
PME arts and crafts clear, gold and red spray lustre.
Sugarflair bronze, radiant gold, sherry lustre dust
Spaghetti
**Use our free cake calculator to make sure you get your ingredients just right!!**
Tools For Chocolate Wrap
Wire cutters
Turntable
Pasta rolling machine
Pallet knife
Small sharp knife
Serrated knife
Rolling pin
Food Pen
Step 1
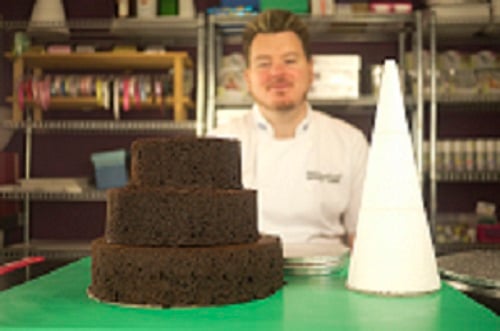
Start with your 3 cakes and cone (which can be styrofoam or made from card or cake box)
Step 2
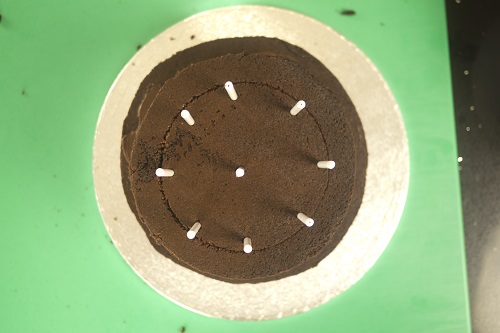
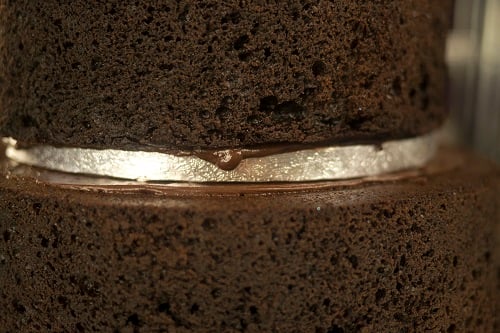
Insert 9 dowels into the cake as shown here placing them like a clock face at 12, 3, 6 and 9 with one in the centre, then half way between each of the hours place another dowel to make 9.
Step 3
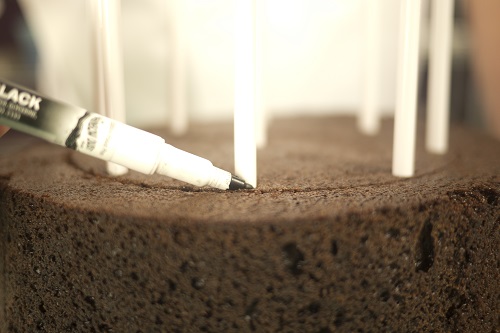
Mark the top of the dowel with a food pen then cut off the excess.
Step 4
Place a cake drum on top of the dowels, sticking down with ganache then add the next tier. Repeat the process by adding dowels to the next tier then add the third tier. Learn how to make ganache for free here.
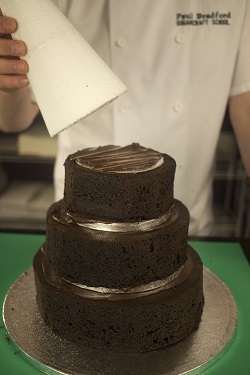
Add the cone using ganache to stick it to the cake card.
Step 5
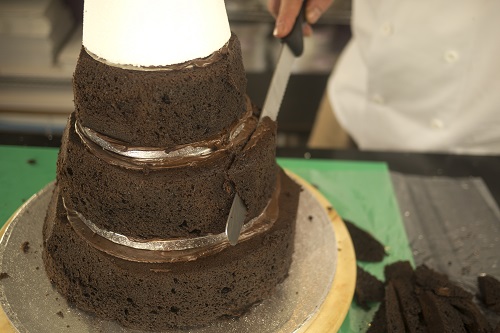
Using your serrated knife carve away the cone shape
Step 6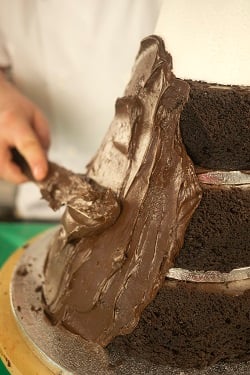
Apply a generous layer of ganache over the cake (including the cone) the place in the fridge (if possible) to give the ganache enough time to set a little.
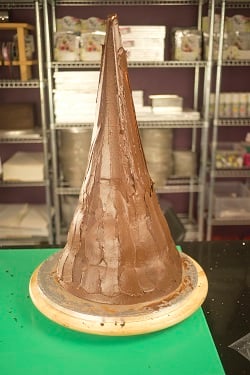
Once it’s cooled, use a warm pallet knife to get the smooth finish effect.
Step 7
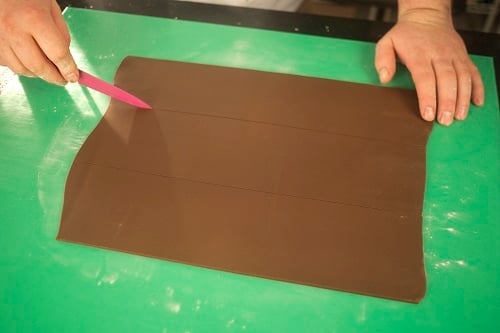
Roll out the modelling chocolate then cut approximately 10cm wide by 45cm long.
Step 8
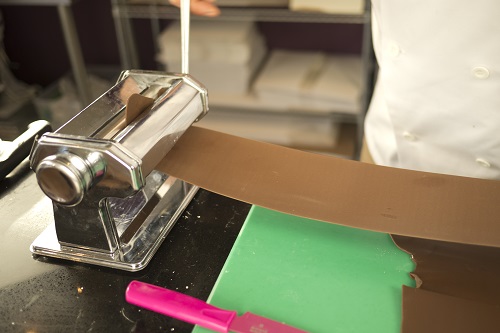
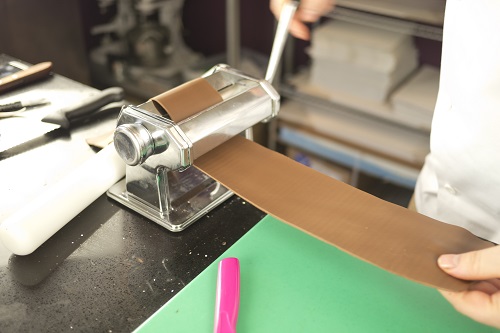
Roll out to approx. 1mm thick using the pasta machine
Step 9 (a)
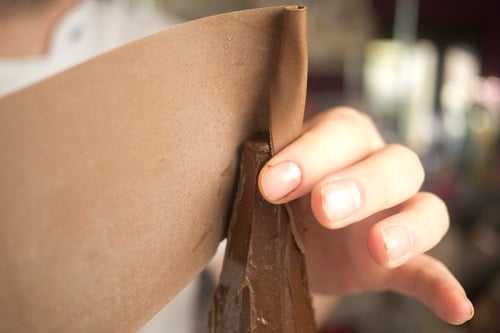
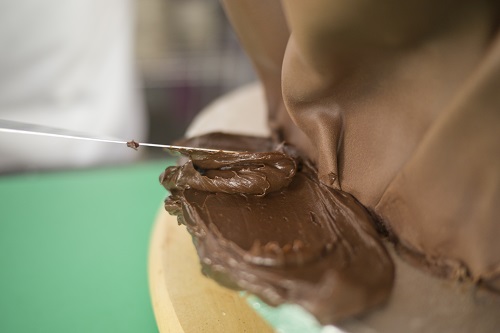
Starting at the top of the cake tuck the first piece into the tip of the cone then simply spiral and mould the modelling chocolate into the shape of the cake.
Step 9 (b)
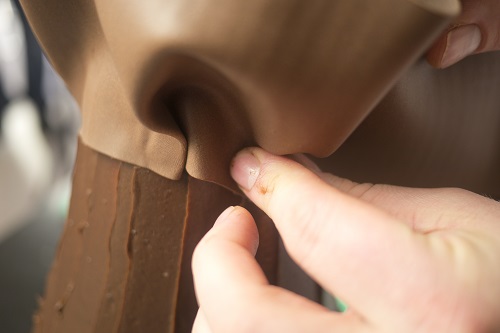
Pinch the bottom as you go to achieve the ruffle effect using the ganache as the glue to keep it in place.
Step 10
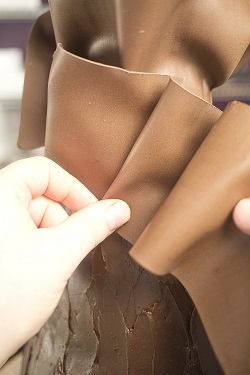
Leave flap open for next layer to be stuck underneath
Step 11
Don’t be too careful as you progress down the cake as you can always change things once they are on.
Step 12
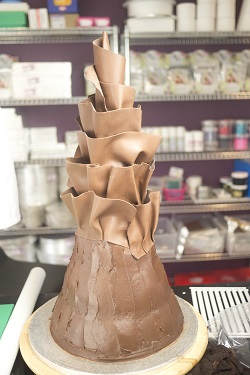
Once done, stand back and make any adjustments that may be required. You will have plenty of decorations to go over bits you aren’t happy with later on.
Step 13
Place the cake on drums to elevate and then apply ganache to the board. Finally, clean the rim of the board and then add the ribbon.
Step 14
Spray cake with PME clear spray to give a glaze effect.
Then add red PME spray to give lustre to the cake.
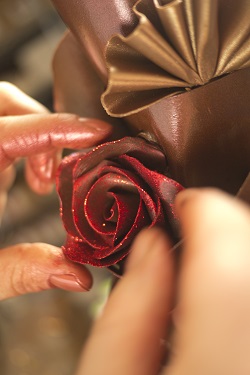
Step 15 – Making the Rose
Step 15(a)
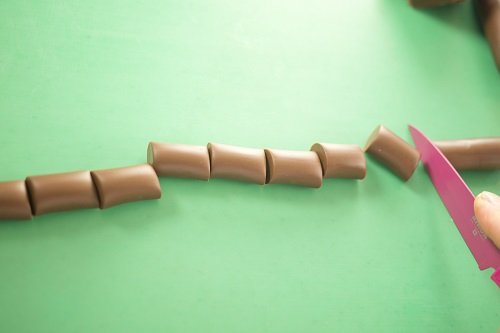
Roll modelling chocolate into a sausage then cut into 11 pieces (approx. 2cm long)
Step 15 (b)
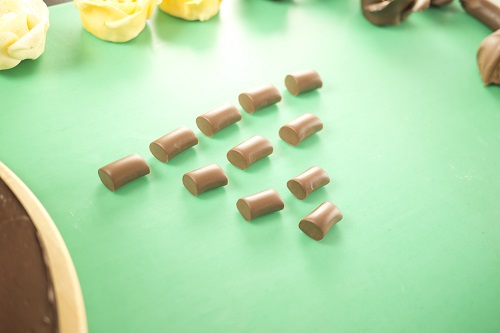
Lay out in pyramid fashion (as shown above)
Step 15 (c)
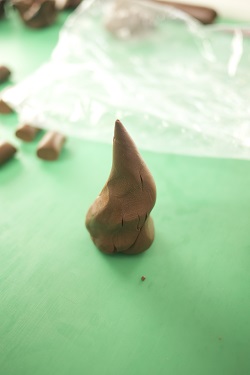
Create a cone shape using modelling chocolate
Step 15 (d)
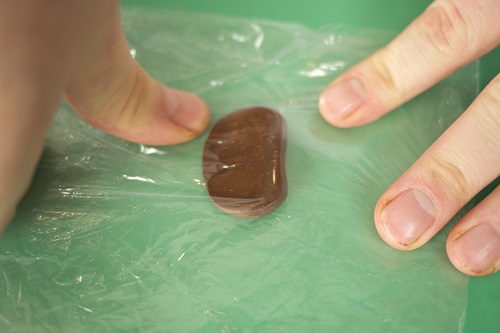
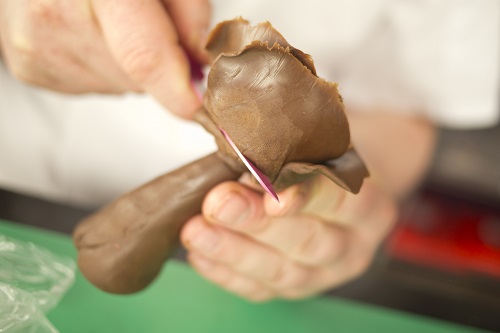
Using a food bag press out the small pieces to create a wedged shaped petal.
Step 15 (e)
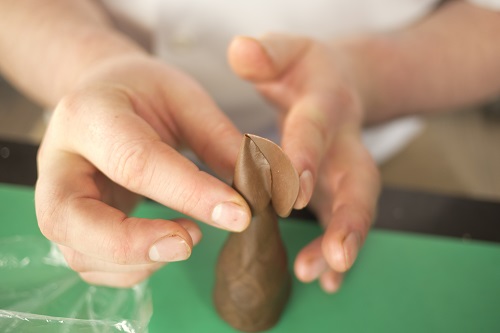
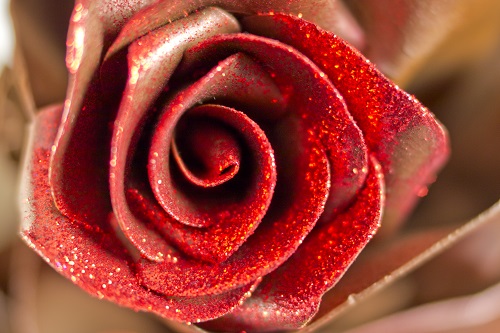
Add the first petal to the cone. Ensure that the petal is tucked in tight.
Step 15 (f)
Interlock the layers as you add petals tucking the newest layer under the last one to form the rose.
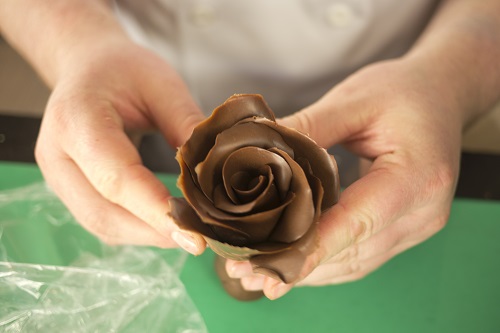
Once complete. Use a sharp knife to cut the rose away from the cone.
Step 15 (h)
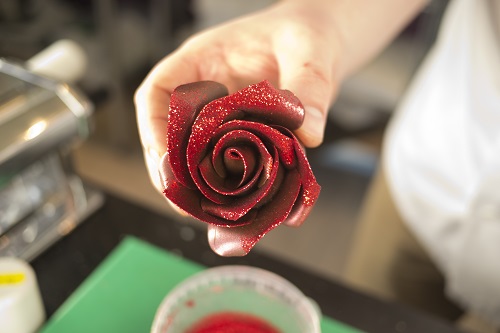
Glaze or decorate as desired.
Step 16 (a)
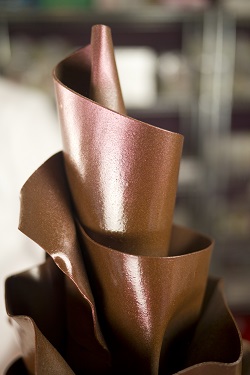
Adding Fans: Roll chocolate down to 0.5mm using the pasta machine.
Step 16 (b)
Lay the chocolate strip down one arm then slowly fold layer after layer.
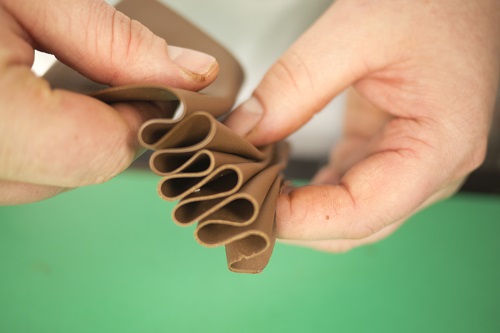
Step 16 (c)
Pinch in the middle, cut, then spread out to form the fans.
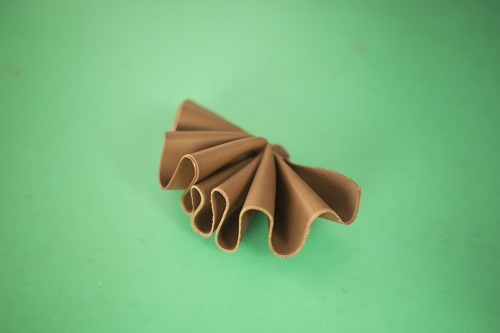
Step 16 (d)
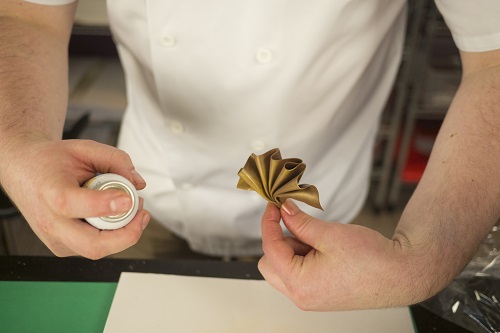
Glaze to achieve the desired effect.
Step 17
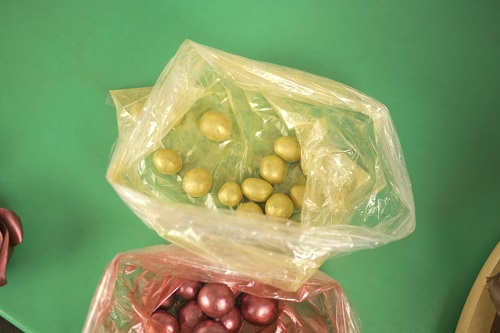
Further decorations can be added by rolling out a sausage of sugarpaste then cutting it into small pieces. You can then roll the small pieces into round balls which can then be coated in edible glitter by shaking in a food bag.
Step 18
Finally, to finish the cake, start adding decorations by using ganache to stick them in place.
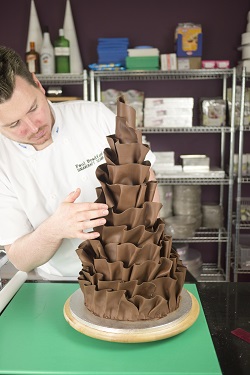
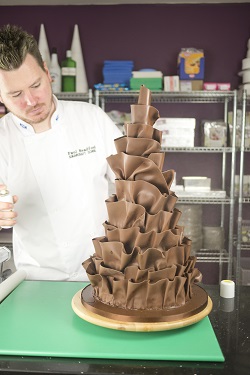
And the finished product should look a little something like this…

Download: Chocolate Wrap Tutorial pdf
Remember to share your interpretations of the chocolate wrap with us on our Facebook group!! and make sure to keep up to date with news, events and tutorials by following us on Facebook, Twitter, Instagram and Pinterest!!
