Tutorial Preview
Sailor Boy Boat
with Paul Bradford
Skill level:
Easy
HD Lessons:
9
05:54
Highlights
Struggling to find the time to watch the whole tutorial? You’ve come to the right place. This video summarises all the key points that you will need to create this cake in no time at all and you can always refer to the individual lessons if you would like more detail.
20:01
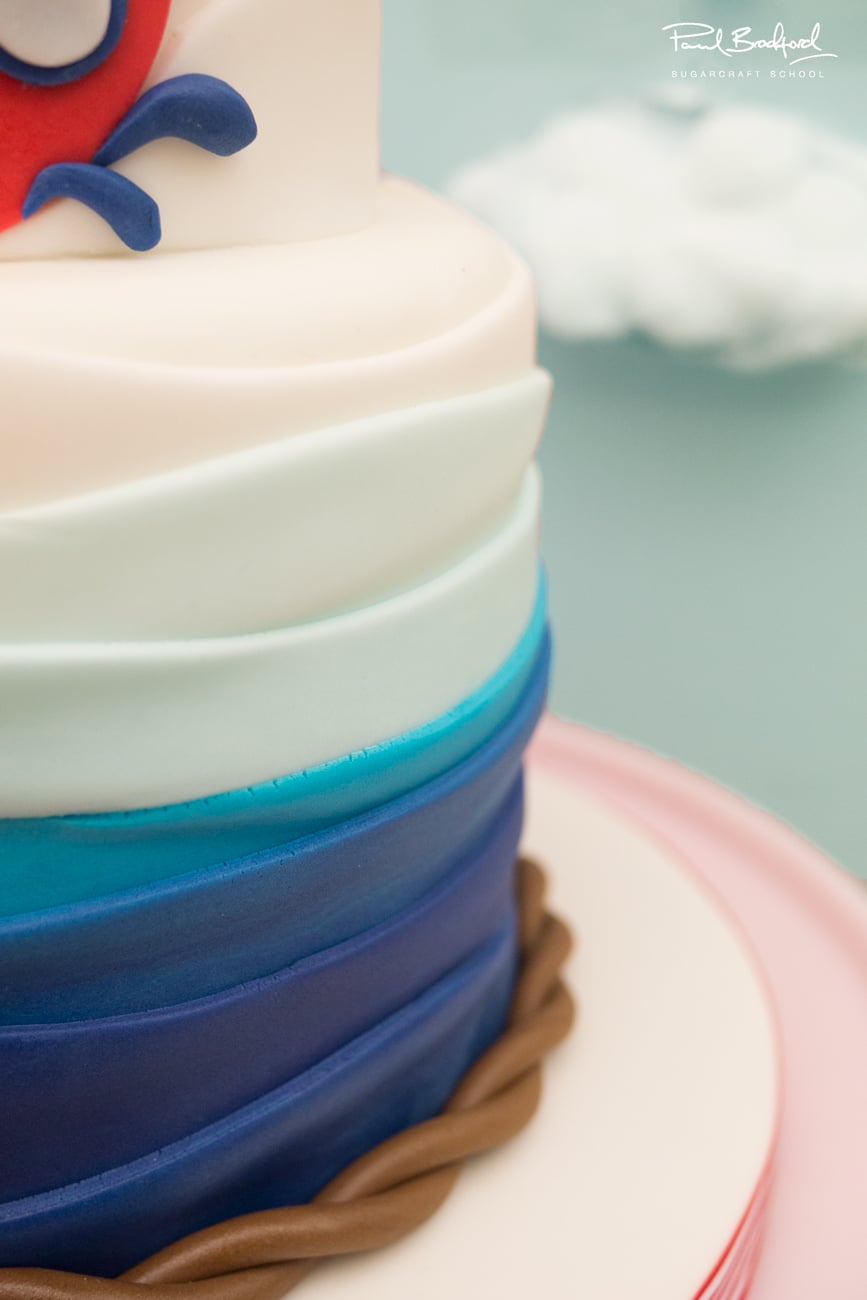
1. Making the Ombre Blue Waves
Paul is quick in with this cake and is a few steps ahead of us, but don’t worry – he explains what he’s done so far and it’s straight forward to follow. If you need to recap on ganching, covering and stacking a double barrelled cake please refer to our FREE TUTORIAL.
Once you have your cakes covered we can get straight onto decorating them. Paul makes some waves in varying shades of blue to wrap around the cake and create an ombre effect. All you need to do is make sausages of sugarpaste, roll them out to make long flat rectangles and then cut wave shapes into them. You will want to measure as you go, so that they are equal sizes and will fit all around the circumference of the cake.
06:52
2. Attaching the Ombre Blue Waves
With the help of some edible glue, it’s time to attach the lovely ombre blue waves. We definitely advise you use edible glue as the waves are quite weighty and may fall off once the water dries. Make sure the glue is thick and quite tacky before attaching each wave, otherwise hold the wave in place for a minute to make sure it doesn’t slide down. The glue that Paul is using is a mixture of CMC powder and water.
04:40
3. Making the Rope
In this lesson, Paul shows us a simple and quick way to make edible rope! All you need to do is make two equally long sausages with brown sugarpaste (you may need cake smoothers) and then twist them around each other. Watch the lesson to see how Paul then entangles them.
12:26
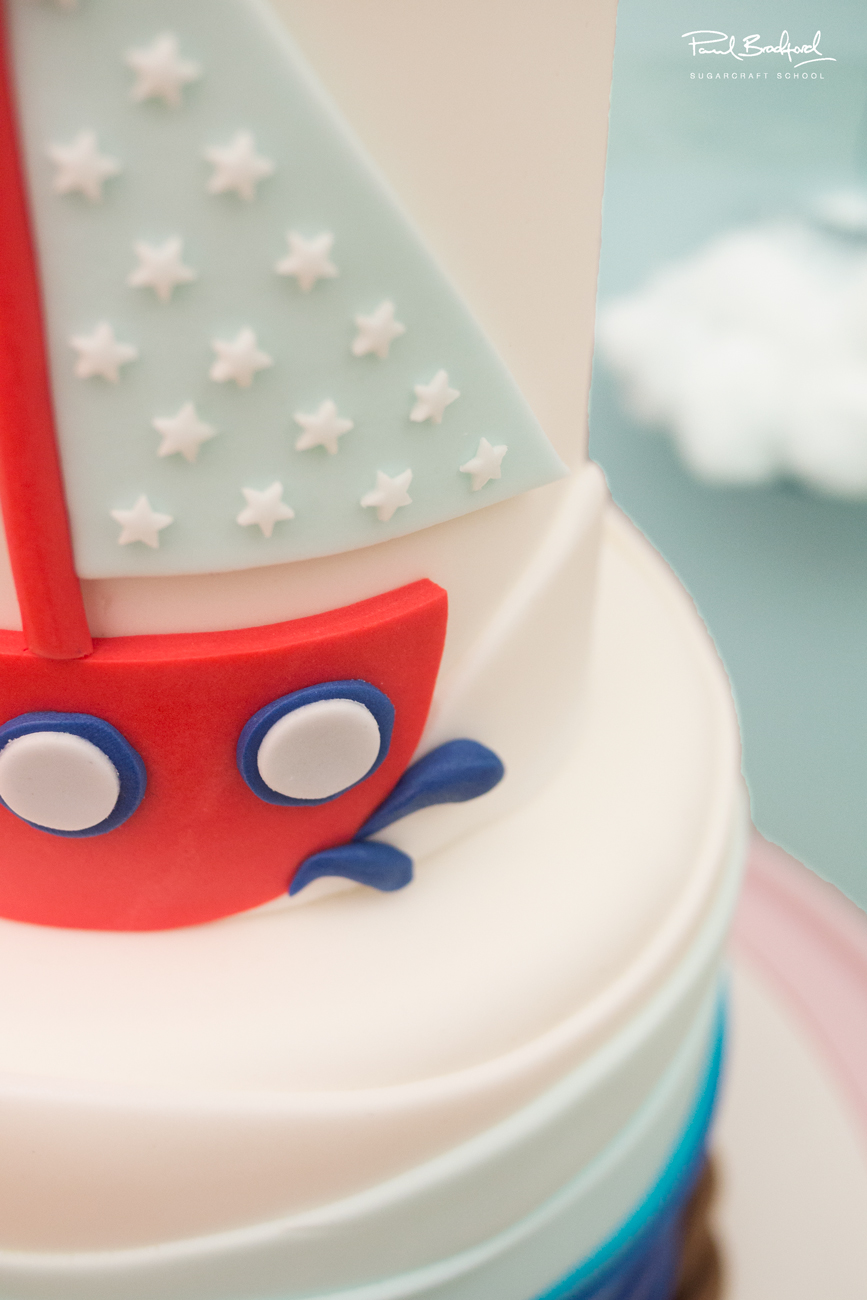
4. Making the Boat
We have some templates available for you to download below which will make things much easier for you. All you need to do is roll out some sugarpaste, drop the templates onto it and then cut out the shapes. Once you have done this, you can decorate the boat sails as you please. Paul has opted to use a small star plunger cutter for one and then thin stripes for another. Once decorated, just let them dry for a little while and if you find your sugarpaste is quite warm like Paul’s’ then just add some CMC to strengthen it. Don’t throw away the templates just yet though. You will use the boat again later on.
05:33
5. Finishing and Attaching the Boat
First of all, Paul uses a small round cutter to cut out some cute little windows for the boat. To give it the effect of a scuttle window, cut out two circles with two different sizes so that one fits on top of the other. When attaching it to the cake, use some tacky edible glue and then we can move onto attaching the last wave.
09:12
6. Finishing Touches
We’re nearly done! To make the final wave you will want to have the boat template to hand. If you want the wave to fit around the boat, then cut out a wave as before but cut out the boat shape in the centre of it. You will then cut it in half and attach it on in two halves. To make the little splashes that Paul creates, simply roll out little tear drops and attach them with some edible glue. Just a little spray of clear glaze on the colours (not as much on the white as it turns yellow) and then choose a ribbon that compliments the design to bring it all together.
01:28
7. Other Ideas
In this lesson, Paul shares some more ideas you can implement to make this cake unique to you. We’re sure you have tonnes of your own too and we would love to see your take on this cake! Please share your pictures with us on our Facebook Page.
00:59
8. Pro Lesson
In this lesson, Paul goes into detail about the cost to make this cake as well as his estimate for what you could charge for this cake – essential information for those of you who run a cake business and want to ensure healthy profit margins.
Paul introduces us to his ocean inspired Sailor Boy Boat Cake. This cake tackles simple carving and stacking techniques, followed by wrapping different shades of sugarpaste to create blue ombre waves on the base tier. Aimed at beginners, this cake will only take a few hours to create and is perfect for a little boy’s birthday or christening.
We would love to see your version of the Sailor Boy Boat Cake – Please share your pictures with us on our facebook page!