Tutorial Preview
Highlights
If you are struggling to fins the time to watch each and every lesson then this is the video for you. Here we have selected all the key points and condensed the whole tutorial into a 15 min video. More than enough to get you started!
1. Making the Mother's Head
All the templates are available at the bottom of the Tools Section.
In this lesson Valentina shows us how to start the mother’s head bringing out all the key shapes and features with one piece of sugarpaste (approx 35g). First of all she adds a little CMC to it and then kneads it until it strengthens. Getting the head shape right at the beginning is key so try and make a slightly oval egg shape and get the eyes in the centre. From here Valentina uses a mixture of modelling tools such as the dresden tool, veining tool, cell stick, small ball tool and her hands to bring it all to life. You will be amazed at how much detail can be formed with the smallest of movements.
2. Making the Eyes
You can see already how amazing this model is going to end up looking after just one lesson and now we are onto the eyes. Always remember to hold the head loosely as you work on it and try and be as delicate and subtle as possible with your modelling tools. Watch how little Valentina does in terms of movement with them but gets amazing results.
3. Making the Mother's Ears
Valentina shows us how to position the ears on the head by measuring out by eye and with the tools you have to hand and marking the head lightly to keep yourself right. Once you have your position simply roll out very small tear drop shapes of sugarpaste and attaches them. To attach them to the head she cleverly pushes them in with a leaf veining tool. This adds a very realistic ear canal and attaches them even more securely. For fine detail she uses her silicone brush and draws a question mark shape on the edge of the ear. To finish she adds more detail by adding in a tiny sausage of white sugarpaste into the mouth which she then closes up more as though revealing the teeth inside.
4. Making the Daughters Head
In this lesson it’s pretty much all the same techniques as used for the mother’s head but obviously things will need to be placed differently as well as the head being a different shape. Valentina points out that children’s head’s tend to be a lot more rounded at the top and as well the eyes are a little lower than the centre of the face. Basically you want to leave more space at the top of the head and move all the features down a little but don’t worry. Valentina will keep us right.
5. Making the Daughters Eyes
Be very careful when cutting your little ball of sugarpaste in half that they are indeed two halves and as equal as possible. It will very quickly show if one is bigger than the other and the eyes will not look the same as each other. If you get this part right you are on the road to success. Make sure the eye sockets are deep enough so that the whites do not bulge out and not too deep that the sink in…of course you can always add a little more sugarpaste if you do this but that is a slippery slope.
6. Making the Daughters Ears
The same techniques are used when making the ears for the mother’s head but of course the placement and sizes of the ears are different. The ears are actually placed slightly lower than the eyes and again make sure that the pieces of sugarpaste you roll into shape for the ears are as equally sized as possible.
7. Decorating the Cakes
In this lesson Valentina shows us how to decorate the cakes using some clever techniques that really make them feel like realistic material setting the scene for the overall design. For the larger cake she uses an impression matt and when using it make sure your sugarpaste is in between setting so it’s not too soft and not too hard to prevent damaging it. Uses a cake smoother to apply pressure is a great idea as it evenly distributes the weight and makes sure it all looks the same. For the smaller cake all she uses is a ruler, a leaf veining tool and some edible perils. The final result looks brilliant and in the next lesson she shows how to really bring them to life.
8. Painting the Larger Cake
Valentina uses satin silver lustre dust mixed with high percentage alcohol and uses a wide brush to lightly paint it on the surface of the cake. She keeps the brush relatively flat which allows it to really bring out the imprint made from the impression matt.
9. Finishing the Small Cake
First of all Valentina rolls out a stripe of the light pink sugarpaste used for covering the small cake. She then lightly paints it in circular motions with a large soft brush similar to a blusher brush and then uses another dry in the same way. For the colour shes uses Shimmer Pink lustre dust mixed with high percentage alcohol. Of course you want to measure the circumference of your cake so you know what length to roll your sugarpaste out as you are going to wrap it around the cake.
10. Making the Mother’s Legs
In this lesson, Valentina shows us how to make incredibly realistic female legs. She starts off by rolling out two cone shapes of sugarpaste from two 40g balls of sugarpaste with some CMC added to them. The templates to help guide you for this lesson are available for download in the tools section. She uses 22 gauge wire through the centre of either leg all the way down to the ankle to help shape and hold the position of the legs.
11. Making the Mother’s Body
Valentina start off with a 80g ball of sugarpaste mixed with CMC and rolls it into a sausage. Again you can use your template to guide you to how long you should roll it out, In this lesson you will only need your hands and a leaf veining tool and a cell stuck. You will be amazed by the results you can get using just your fingers.
12. Making the Mother’s Dress
Let’s put some clothes on the mother shall we? Valentina starts by rolling out a very thin piece of black sugarpaste which she rubs to bring out a nice shiny look. she then cuts it into a rectangular shape and simply wets the body with some water and wraps it around.
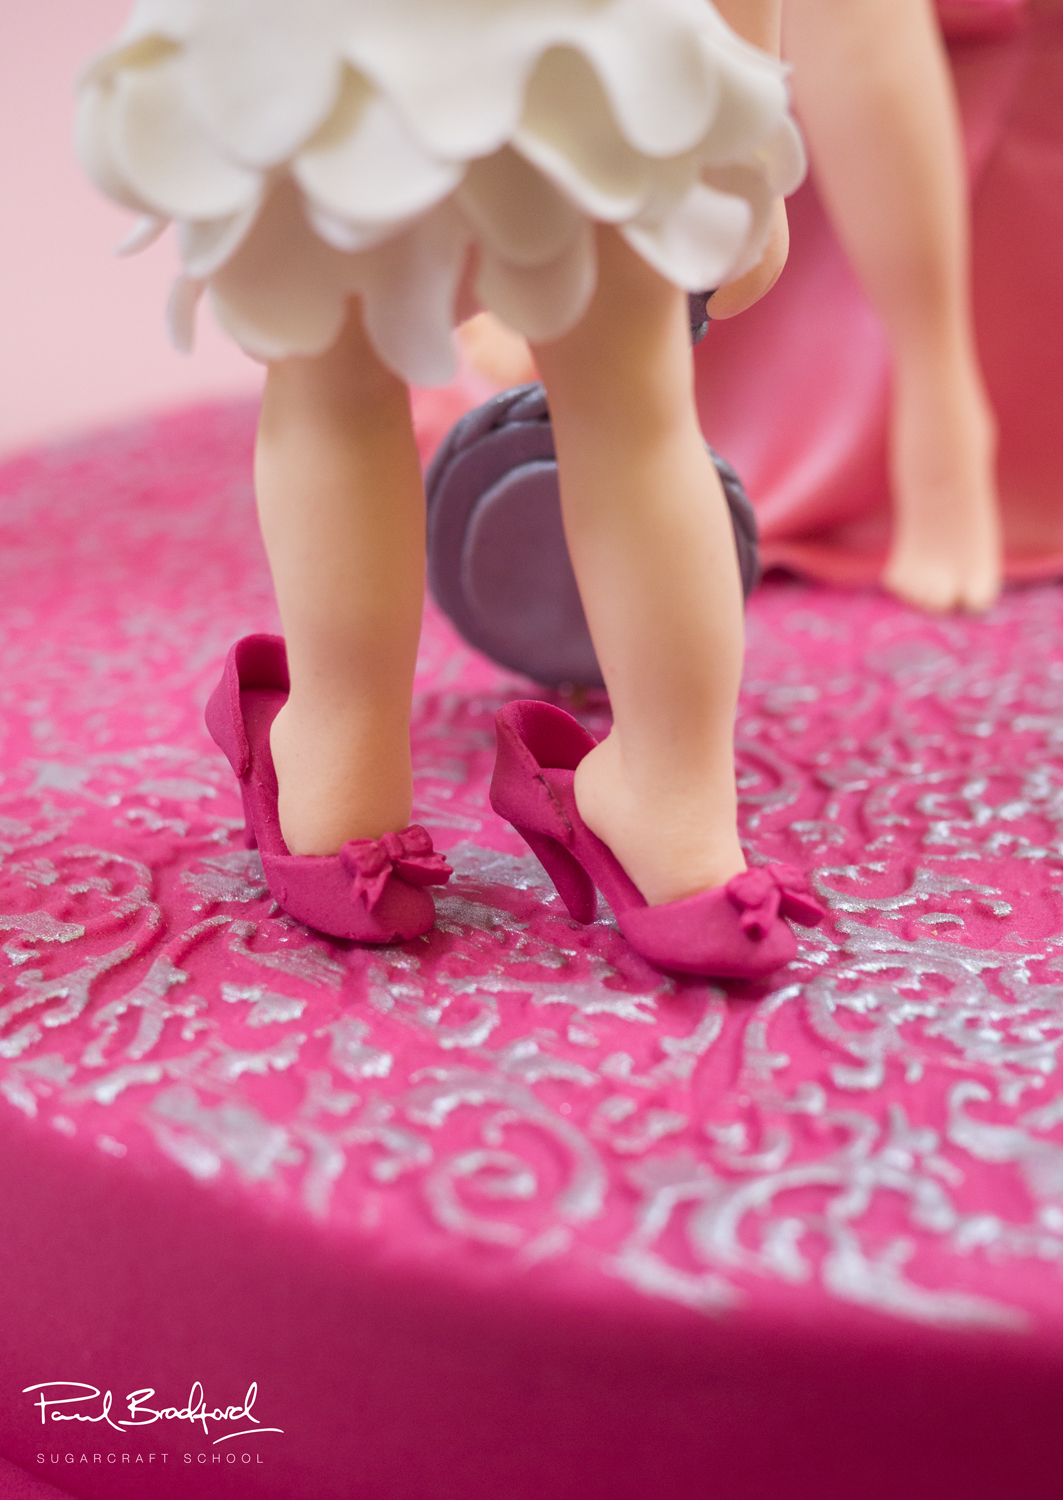
13. Making the Mother’s Shoes
Valentina uses flower paste the same colour as the cake for this lesson and shows us how to make tiny cute shoes that the little girl will be wearing. You may want to avoid coffee before this stage as you will need a steady hand. The cutters that she uses are included in this set.
14. Making the Hand Mirror
In this lesson Valentina show us how to make a pretty miniature hand mirror that the mother and daughter will be holding.
15. Making the Makeup puffs
This one is a nice short and easy lesson making the cute little makeup puffs. Valentina mixes a little pink sugarpaste with some White to get a nice light pink tone. She uses a clever technique of placing cling film over the sugarpaste when cutting out circles which gives them a natural curve as opposed to being flat. As well it makes them very smooth and easy to take off as the cling film doesn’t stick.
16. Making the Child’s Legs
Much the same technique as used for making the mother’s legs but of course you will be referring to a smaller template and shaping them slightly differently. They key is to make sure that you are using the exact same amount of sugarpaste for each leg and keep checking them against each other refer to your template.
17. Making the Child’s Body
This lesson is a lot simpler than making the body for the mother as there is a lot less shape to it. Again refer to the templates provided and make sure you have clean hands.
18. Making the Child’s Clothes
Valentina starts off by rolling out some pink sugarpaste but not too thinly as she uses an impression mat on it to add some nice detail. If you roll it too thin the detail will not show properly so beware of that. Use a circle cutter to cut out a half circle at the top of the dress to allow it to wrap around the neck of the body. Then it’s just a case of cutting it to size and then wrapping it round the body with a little edible glue or water to secure it. For the skirt she uses a frill cutter and then goes round the edges with a ball tool to add shape and adds them in strips around the body at different heights.
19. Detailing Clothes and Adding Decorations
To add prettiness to the child’s clothes Valentina adds edible pearl balls b indenting the dress with the small end of a ball tool and placing the balls in with a little edible glue. She then makes simple sugar roses which she decorates the base of the cake with. For the roses she uses a very simple, effective and quick technique which you will use time and time again.
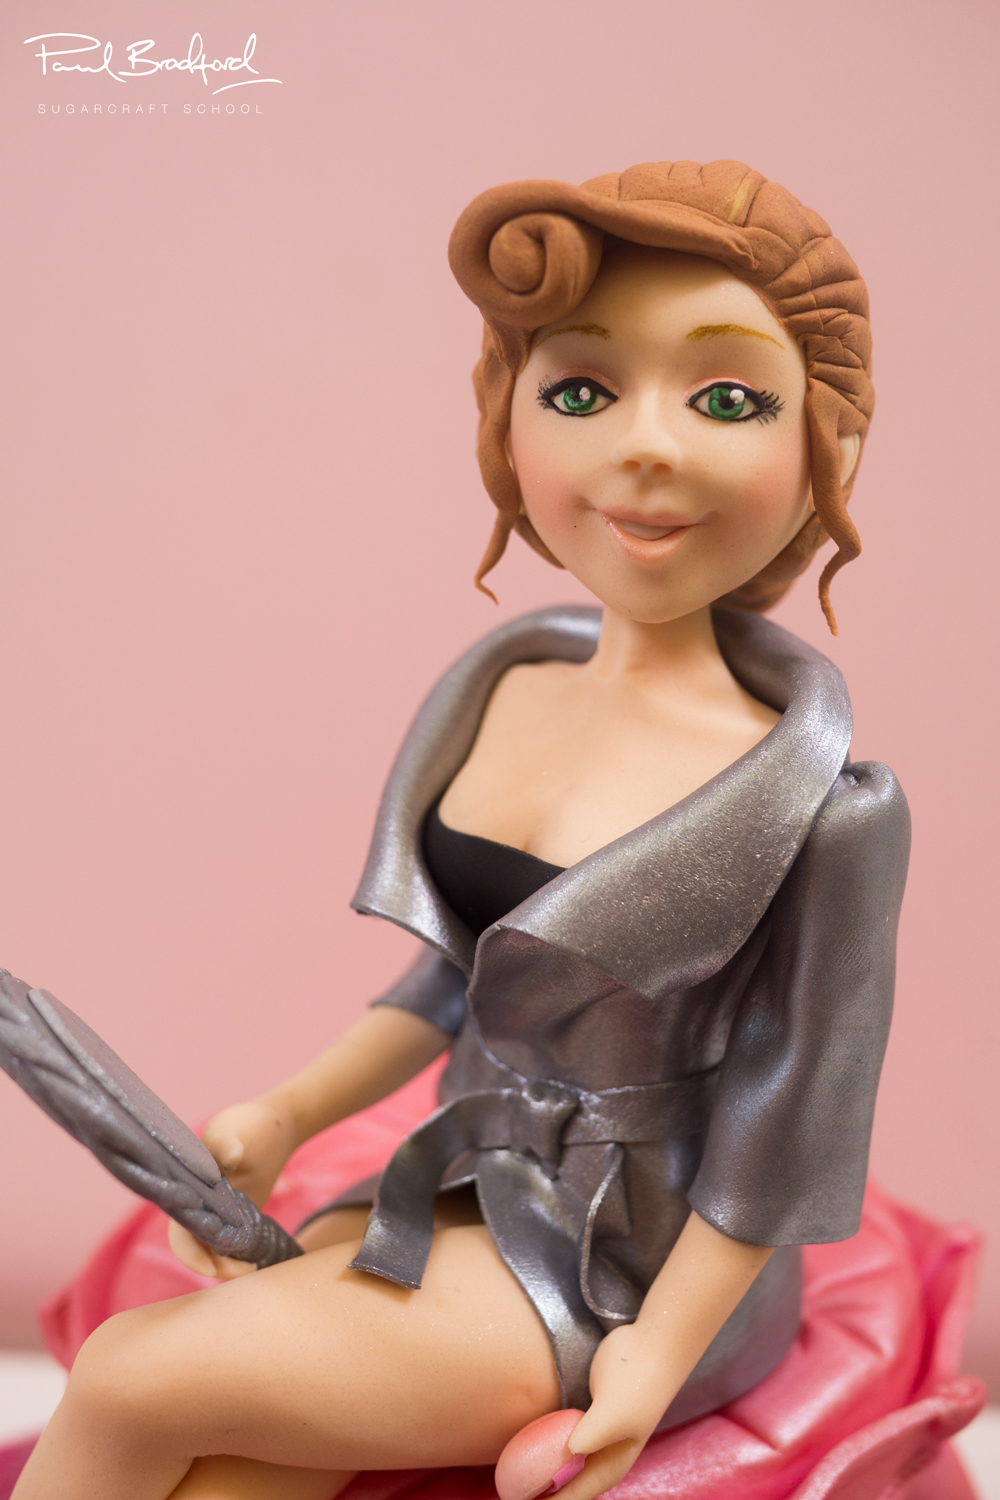
20. Making the Dressing Gown for the Mother
To get the lovely shiny material look Valentina uses some silver lustre dust with high percentage alcohol and brushes it on with a wide soft paintbrush and then uses a dry paintbrush to paint over it again to add a nice texture.She then cuts out a rectangular shape which she has pre-measured and wraps it around the body.
21. Making the Mother’s Arms
Valentina starts off with 20g of flesh coloured sugarpaste which she then divides into two to give her the correct amount of sugarpaste per arm. It’s always worth weighing as you go to make sure as it will make your life a lot easier. As well you do have the templates to refer to which again will help. Don’t place the arms on just yet however as we are still to put the sleeves on.
22. Making the Mother’s Sleeves
In this lesson Valentina uses the same technique she used for wrapping the mother’s body. She uses the piece of sugarpaste she prepared earlier painted in the silver lustre and simply cuts it so size and wraps it around the arms. Once it is on she then carefully puts the arms on the body using pliers.
23. Making the Child’s Ragdoll
Some quick and basic modelling here which will seem like child’s play compared to making the mother and daughter. Valentina shows us how to make a cute little ragdoll that the child will be holding.
24. Making the Child’s Arms
Now that you have made and completed the mother you will be an expert so this lesson will be a breeze. The exact same techniques used but of course a slightly different shape and size. Use the templates available and again double check your sugarpaste amounts and you will be fine.
25. Painting the Eyes Pt 1
You may want to have cotton buds and high percentage alcohol to hand at this stage so you can clean any mistakes you might make. To start off Valentina cuts out tiny circles of green sugarpaste with a piping nozzle which she uses for the iris’ of the eyes. She then mixes a small amount of green and black paint (Lustre mixed with vodka) and then paints very fine detail over the green sugarpaste while attached to the head. You are aiming to paint very faint lines that go from the centre of the eye out. It may help to study your own eye for a moment and copy what you see. Don’t get too carried away of course. We don’t need to paint blood vessels or anything like that. For the pupils she adds a tiny dot of black paint with the a very small ball tool which is a lot easier than using a tiny dot of sugarpaste.
26. Painting the Eyes Pt 2
Valentina shows us how to finish off the eyes by adding eyeliner and eyebrows with some black paint and very thin sausages of black and brown sugarpaste. Of course the girls eyes are made slightly differently from the mother’s as she is a little young for eye make up! She then adds a little bit of rose dust to their cheeks to bring them to life with light strokes starting from the edge of the mouth toward out.
27. Attaching the Heads
First of all we need to finish the eyes by adding little specs of white to bring a little life to them. You could try and paint them but you may find you have more control by attaching tiny balls of white sugarpaste which is what Valentina does. When attaching the heads make sure they are not too soft before doing so as they might change shape as you put them on.
28. Making the Mother’s Hair
Valentina uses 20g of Yellow sugarpaste and 20g of Brown sugarpaste and mixes them together to create a nice brunette tone. She starts off by creating a flat piece of medium thick sugarpaste which she shape around the head and then simply adds smaller pieces to it to create a stick up fringe and so on. She then uses her leaf veining tool to mark it and put lines throughout the hair. A very simple and quick technique to create realistic hair.
29. Making the Child’s Hair
For the child’s hair Valentina uses leftover sugarpaste she used for the Mother with a little more yellow mixed in to make it a little lighter. She then shapes it around the head in a similar way to the mother’s and then adds a pony tail by making a large thick tear drop shape of sugarpaste stuck to the back of the head and resting over her left shoulder which looks very cute.
30. Finishing Touches
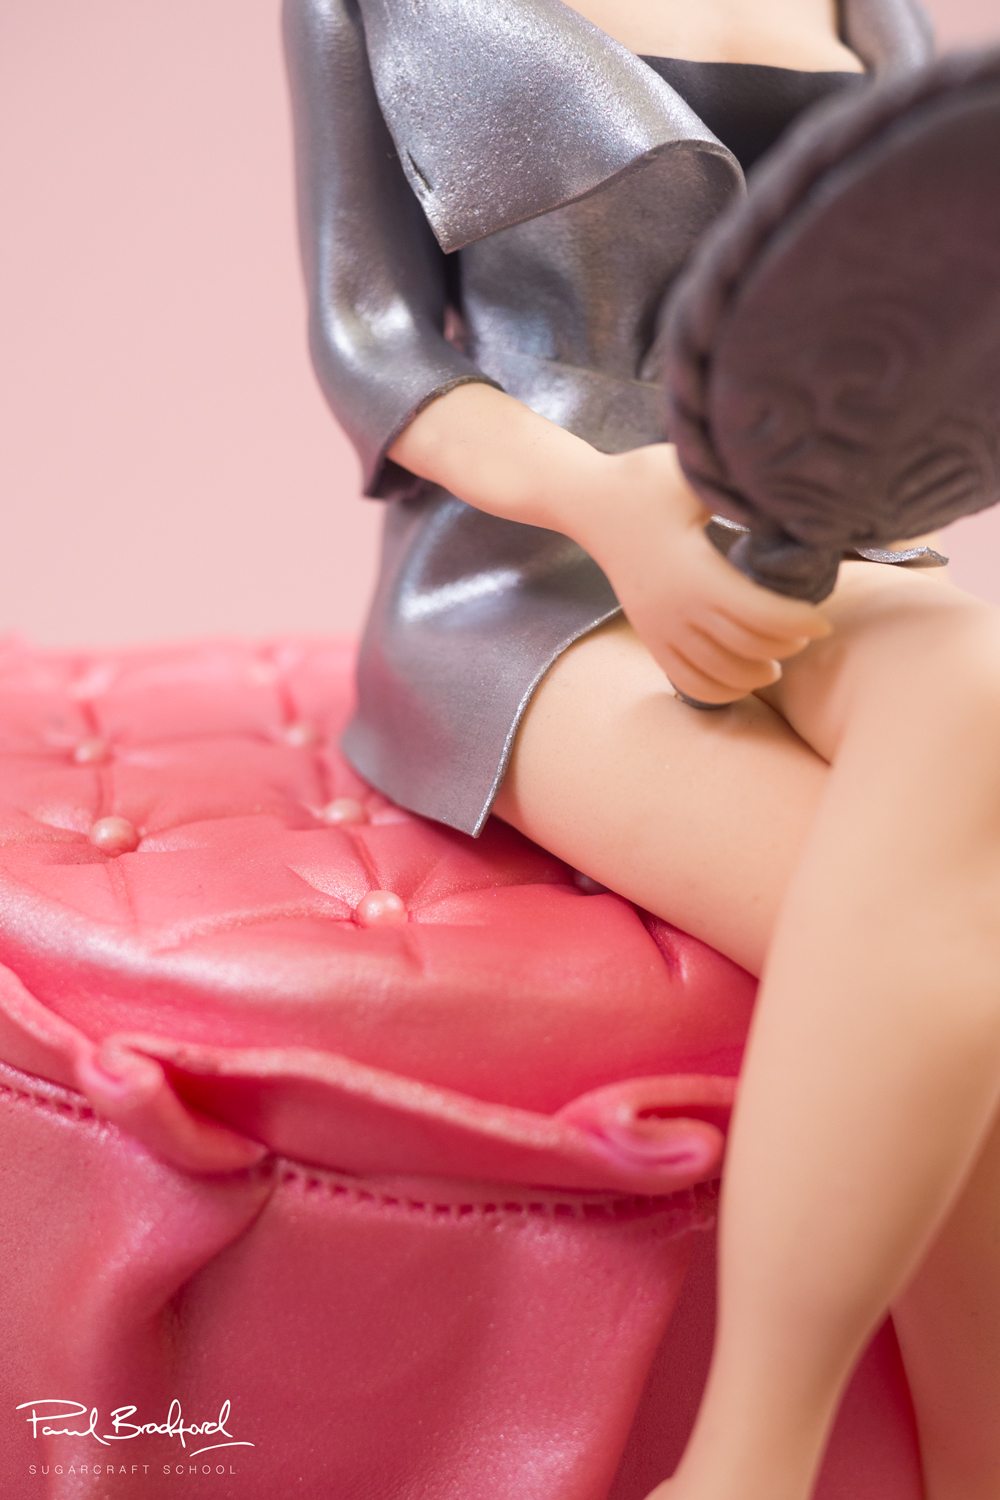
Just a few little things to do and then we are all done! Valentina paints a simple smiley face onto the ragdoll, attaches the makeup puff to the hand of the mother as well as the mirrors for both the mother and daughter. She uses small pieces of spaghetti pierced into the mirrors to help attach them securely to the models which is a little more reliable than using just edible glue.
31. Other Ideas
In this lesson Valentina shares some other ideas you can use when making this cake to make it unique to you. We are sure you have some of your own fantastic ideas and we would love to see them! Share your pictures with us on our facebook page as well as Valentina’s.
32. Pro Lesson
In this lesson Paul and Valentina gives us some insider information detailing the cost of ingredients as well as how much to charge when making this cake and how to market it. Vital information for any professional cake designer.
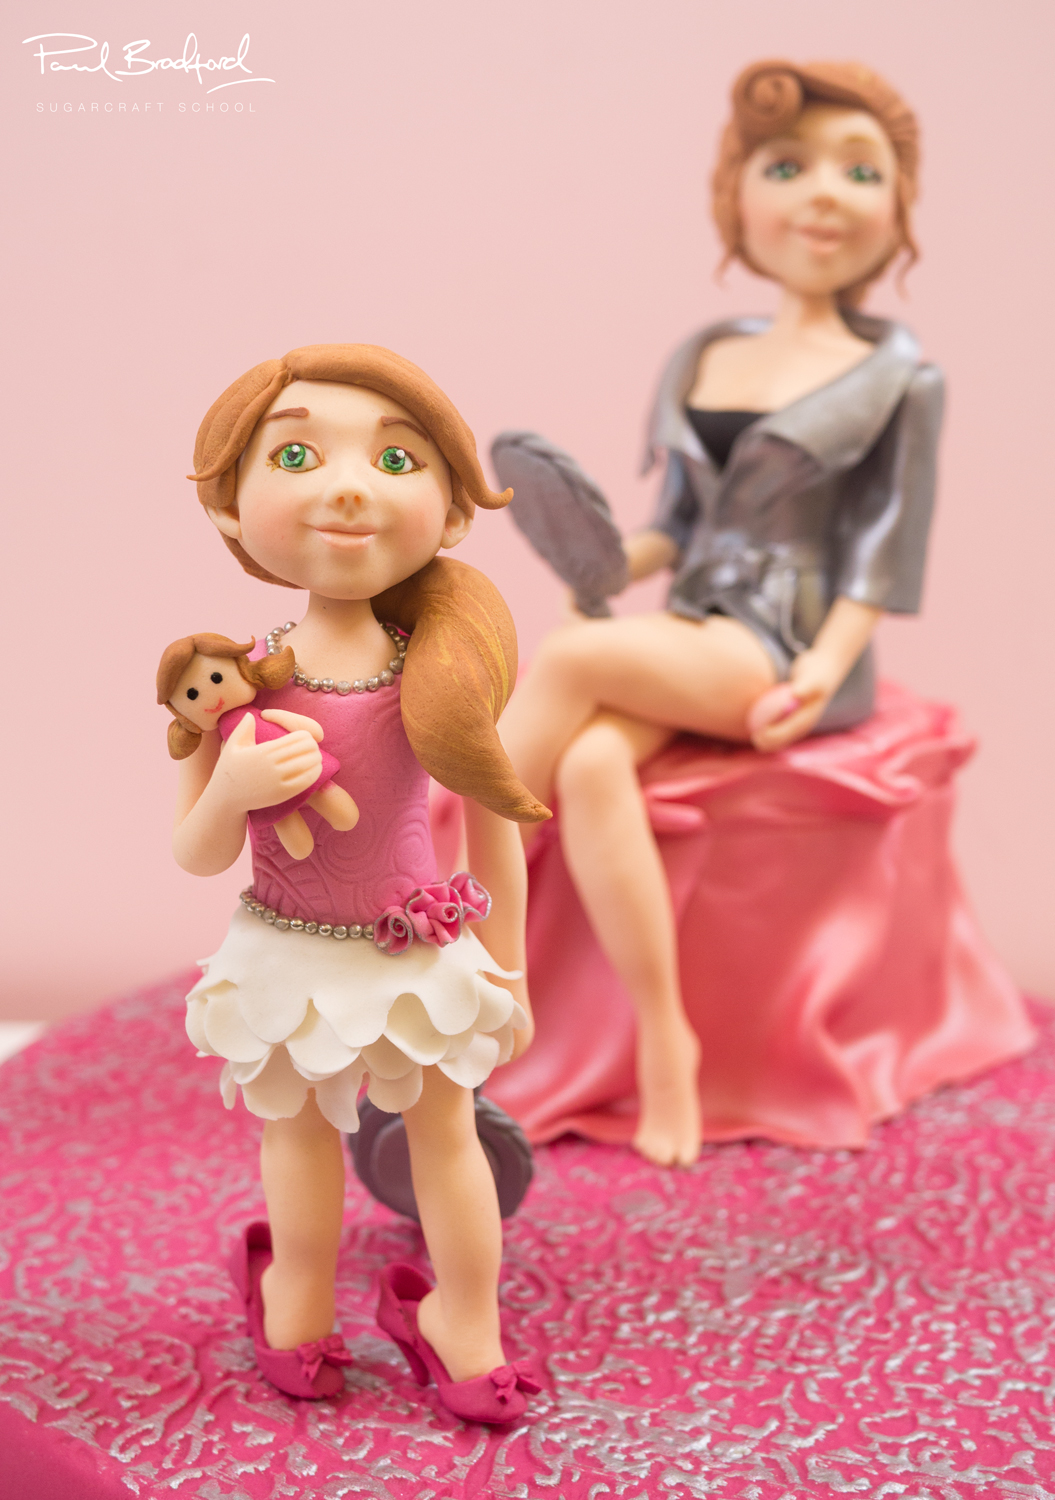
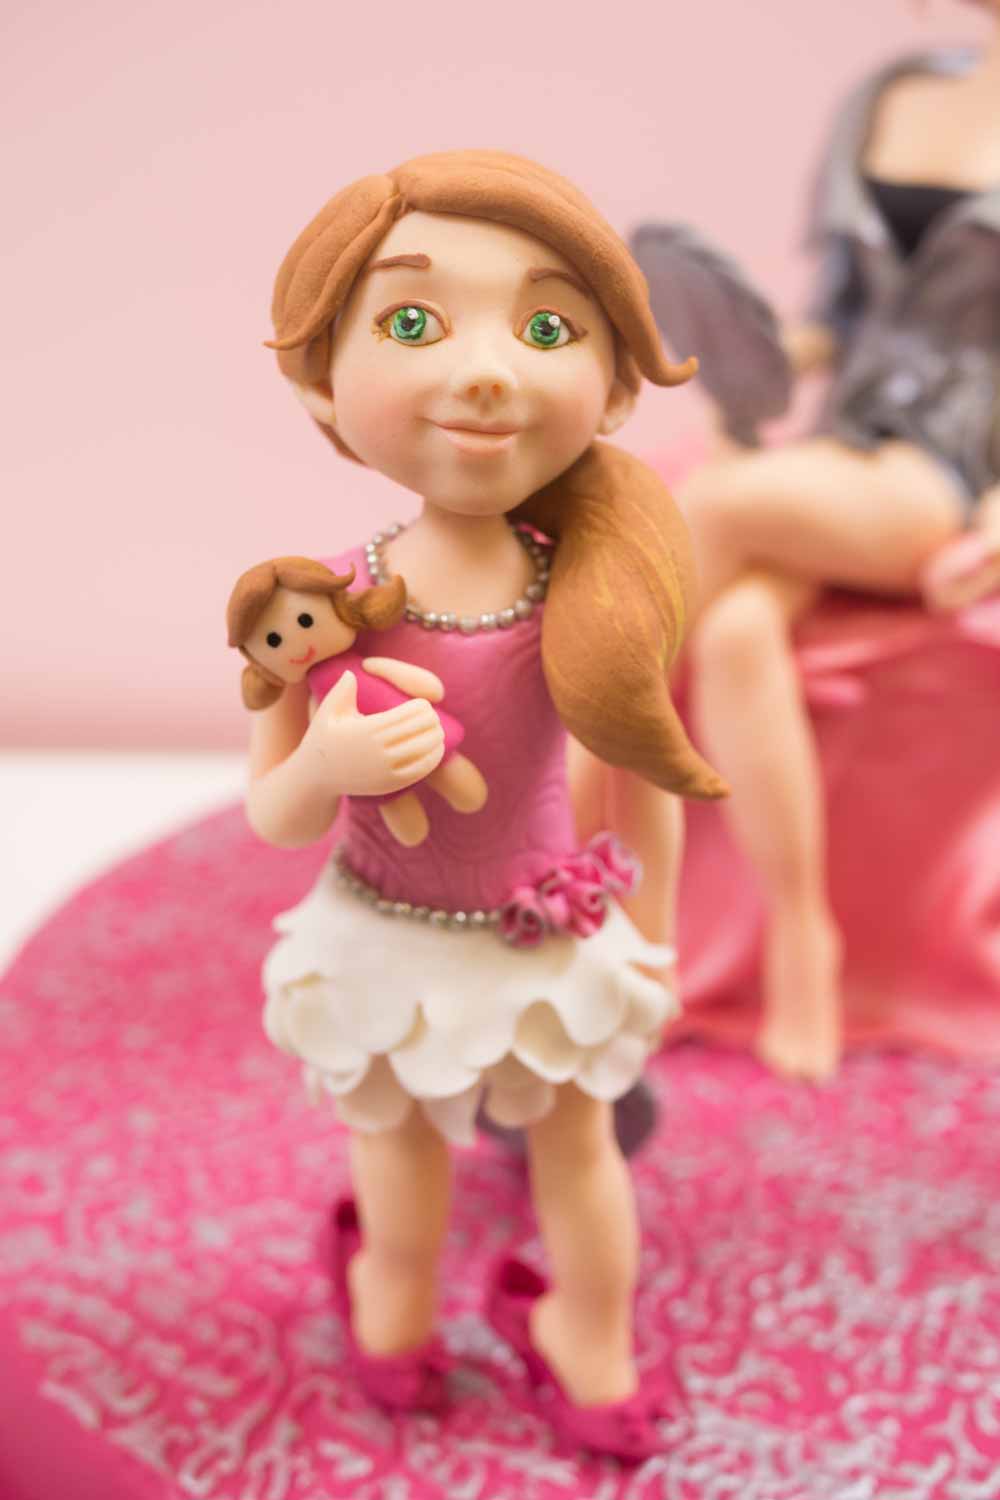
Valentina of Valentina’s Sugarland introduces us to her incredibly detailed Mother & Daughter Playtime cake. In this tutorial you will be learning advanced modelling skills, as well as some quirky ways of decorating a cake. This tutorial is aimed at advanced cake designers or perhaps you’re an intermediate level decorator looking to move up a level. It is estimated to take around two days to create, including drying time.
We would love to see your take on the Mother and Daughter Play Time Cake – please share your photos with us on our Facebook Page as well as Valentina’s!