Tutorial Preview
Highlights
If you are struggling to find the time to watch each and every lesson then this is the video for you. Here we have selected all the key points and condensed the whole tutorial into a 10 min video. More than enough to get you started!
1. Getting Started
Struggling for time? Why not watch the highlights video and watch the whole tutorial in under 9 mins! Here Paul creates neat ganached cakes then covers them in multi coloured ganache! Paul explains how he us cut and layered the cakes.
To see how Paul stacks a double barrel cake follow the link below to this free course…
http://www.cakeflix.com/online-cake-decorating-courses/paul-covering-a-cake
2. Preparing the Cake Pt 1
In this lesson Paul shows us how he is cutting, filling and ganaching the cakes. Paul is using a lovely american style butter cream but being Paul he has added a little white chocolate ganache to it. It tastes lovely and has a nice smooth finish to it as well.
The Ingredients and method for making the buttercream can be found in the ingredients section.
3. Preparing the Cake Pt 2
Paul shows us how to apply the second layer of ganache and how to get rid of any unwanted bulges! Just remember to build up a nice lip at the top so you can eventually create a nice sharp top.
4. Preparing the Cake Pt 3
So Paul has added the fourth and final layer of ganache to the cake and it is looking lovely and neat. All he needs to do now is finish the top and then we’re done! Now we can move onto the really fun stuff!
5. Preparing the Cake Pt 4
Ok…one last little thing and then we can move on. It’s totally worth all this ganaching however as the end result is so lovely and satisfying. Don’t get too hung up on the tops of the cakes as they will be covered in multi covered ganache.
6. Covering the Board
Paul covers the board making sure he can’t see any of the board from above and leaves putting on the ribbon for just now as he wants to decide on the colour once all the ganache is on. Paul decides that he wants the cake to hover above the board to add to the effect of the ganache dripping down the cake by using to cake drums stuck to the middle of the board.
7. Making the Ganache
Make sure you’re not hungry before watching this lesson! Paul share his mouth watering white chocolate ganache recipe with us and recommends increasing the chocolate to cream ratio if you are in a warmer climate. White chocolate ganache can be quite temperamental and isn’t as reliable as say dark chocolate ganache so be careful.
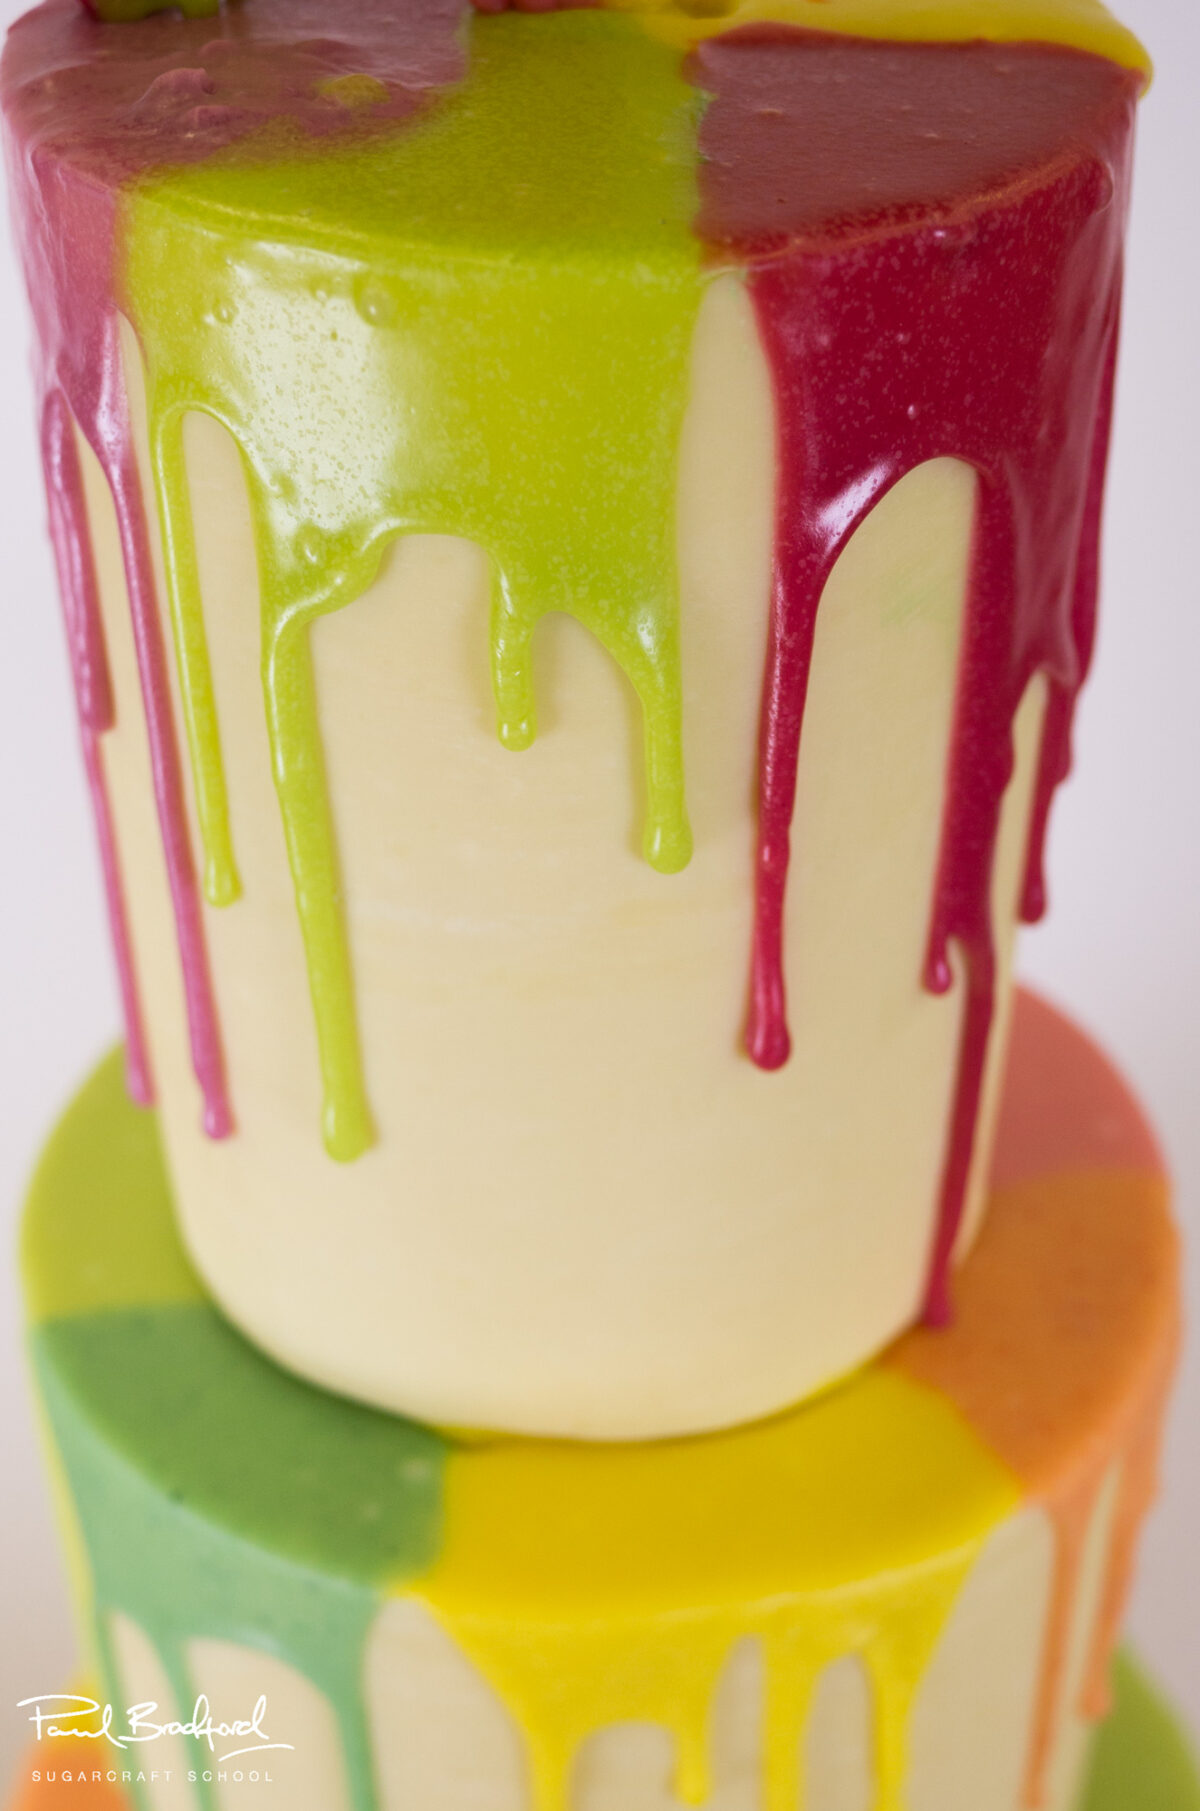
8. Dripping the Ganache
Now we are onto the fun stuff! Now this may sound very easy…melting chocolate, adding colour and then pouring it onto the cake BUT in actual fact it’s quite tricky as you will see later on. Getting the temperature of the chocolate just right proves to be challenging as the dust colours can react strangely and getting the chocolate to run the way you want to requires a few attempts but Paul will keep us right!
9. Stacking the Cake
In this lesson Paul stacks the cakes on top of each other and demonstrates adding dowels to add the all important support and stability. When lifting the cakes it might be a good idea to use something like paper towels when handling the cakes as Paul has. Warm hands and milk chocolate don’t tend to work together very nicely.
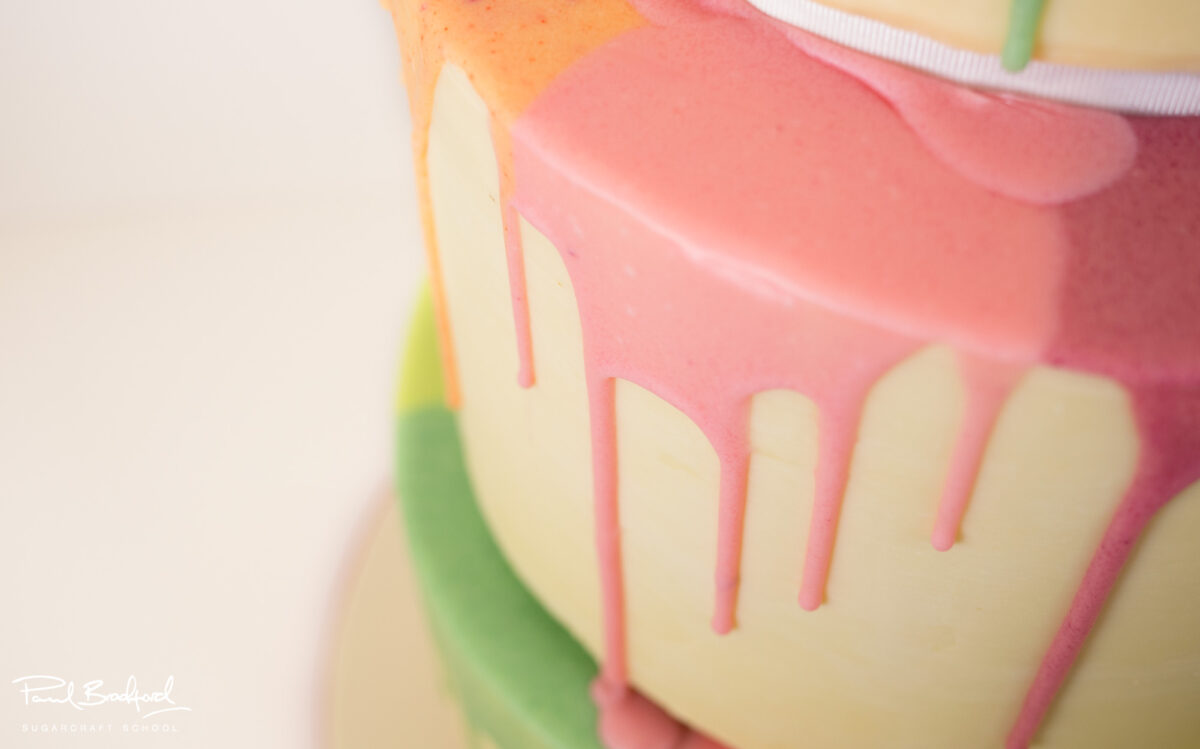
10. Dripping the Ganache
Sow now we get to see Paul adding more tasty and colourful ganache to the cake and what lengthy process it is! Definitely not as simply as you might think. Getting the exact temperatures, amounts. Right ratios of dusts to chocolate and so on. But the final result is worth it. Definitely use the microwave in short bursts and avoid overheating as much as you can!
11. Making the no. 4
First of Paul finishes off the dripping ganache which is proving tricky once again but he gets there in the end! Now that all the ganache is on and looking lovely it’s time to create the number 4 that will be sat on top of the cake. Paul decides to use white modelling chocolate as opposed to sugarpaste or flower paste. To help support it he inserts bamboo skewers and then leaves it to dry.
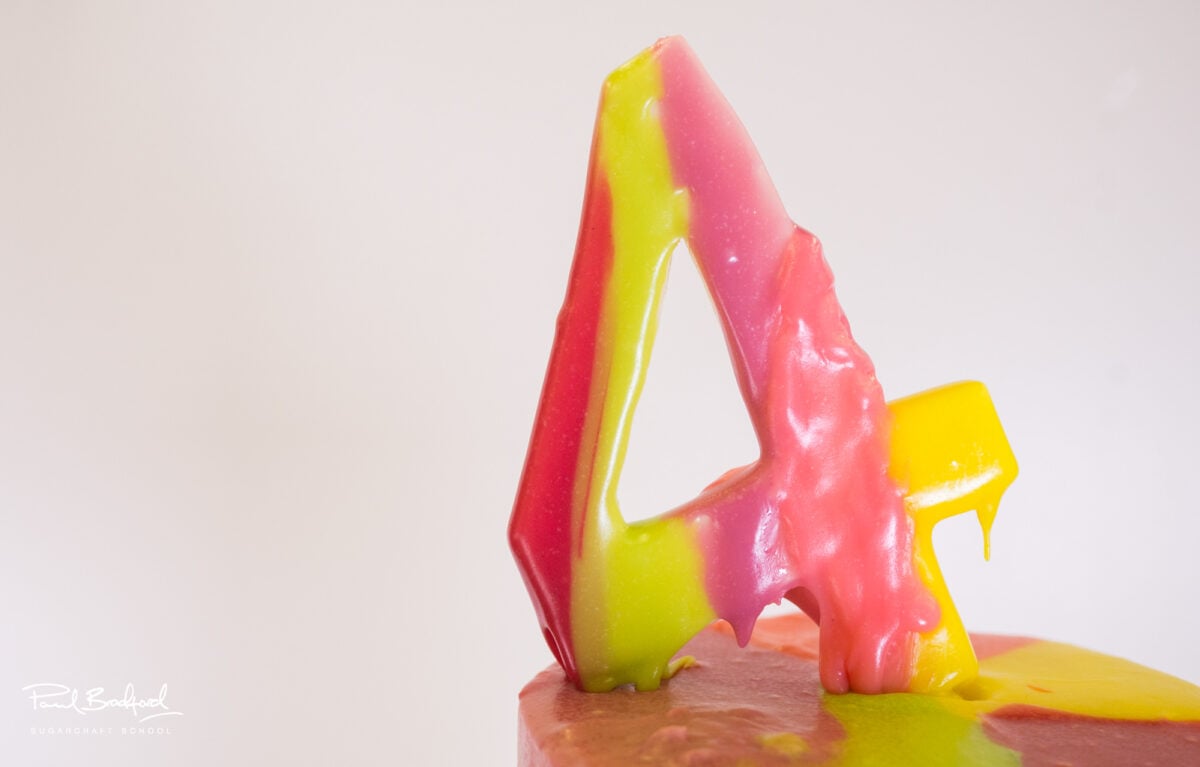
12. Finishing the Number 4
Now that the number 4 has been in the freezer and nicely set it’s time to cover it in ganache. Paul wants to carry the same style used on the cake onto this decoration to keep it fun, The idea behind it is to look as though the number is the source of all the chocolate flowing down. Paul cleverley uses small piping bags to add the ganache with control and then places it back in the freezer to make sure all the drips stay in the right places.
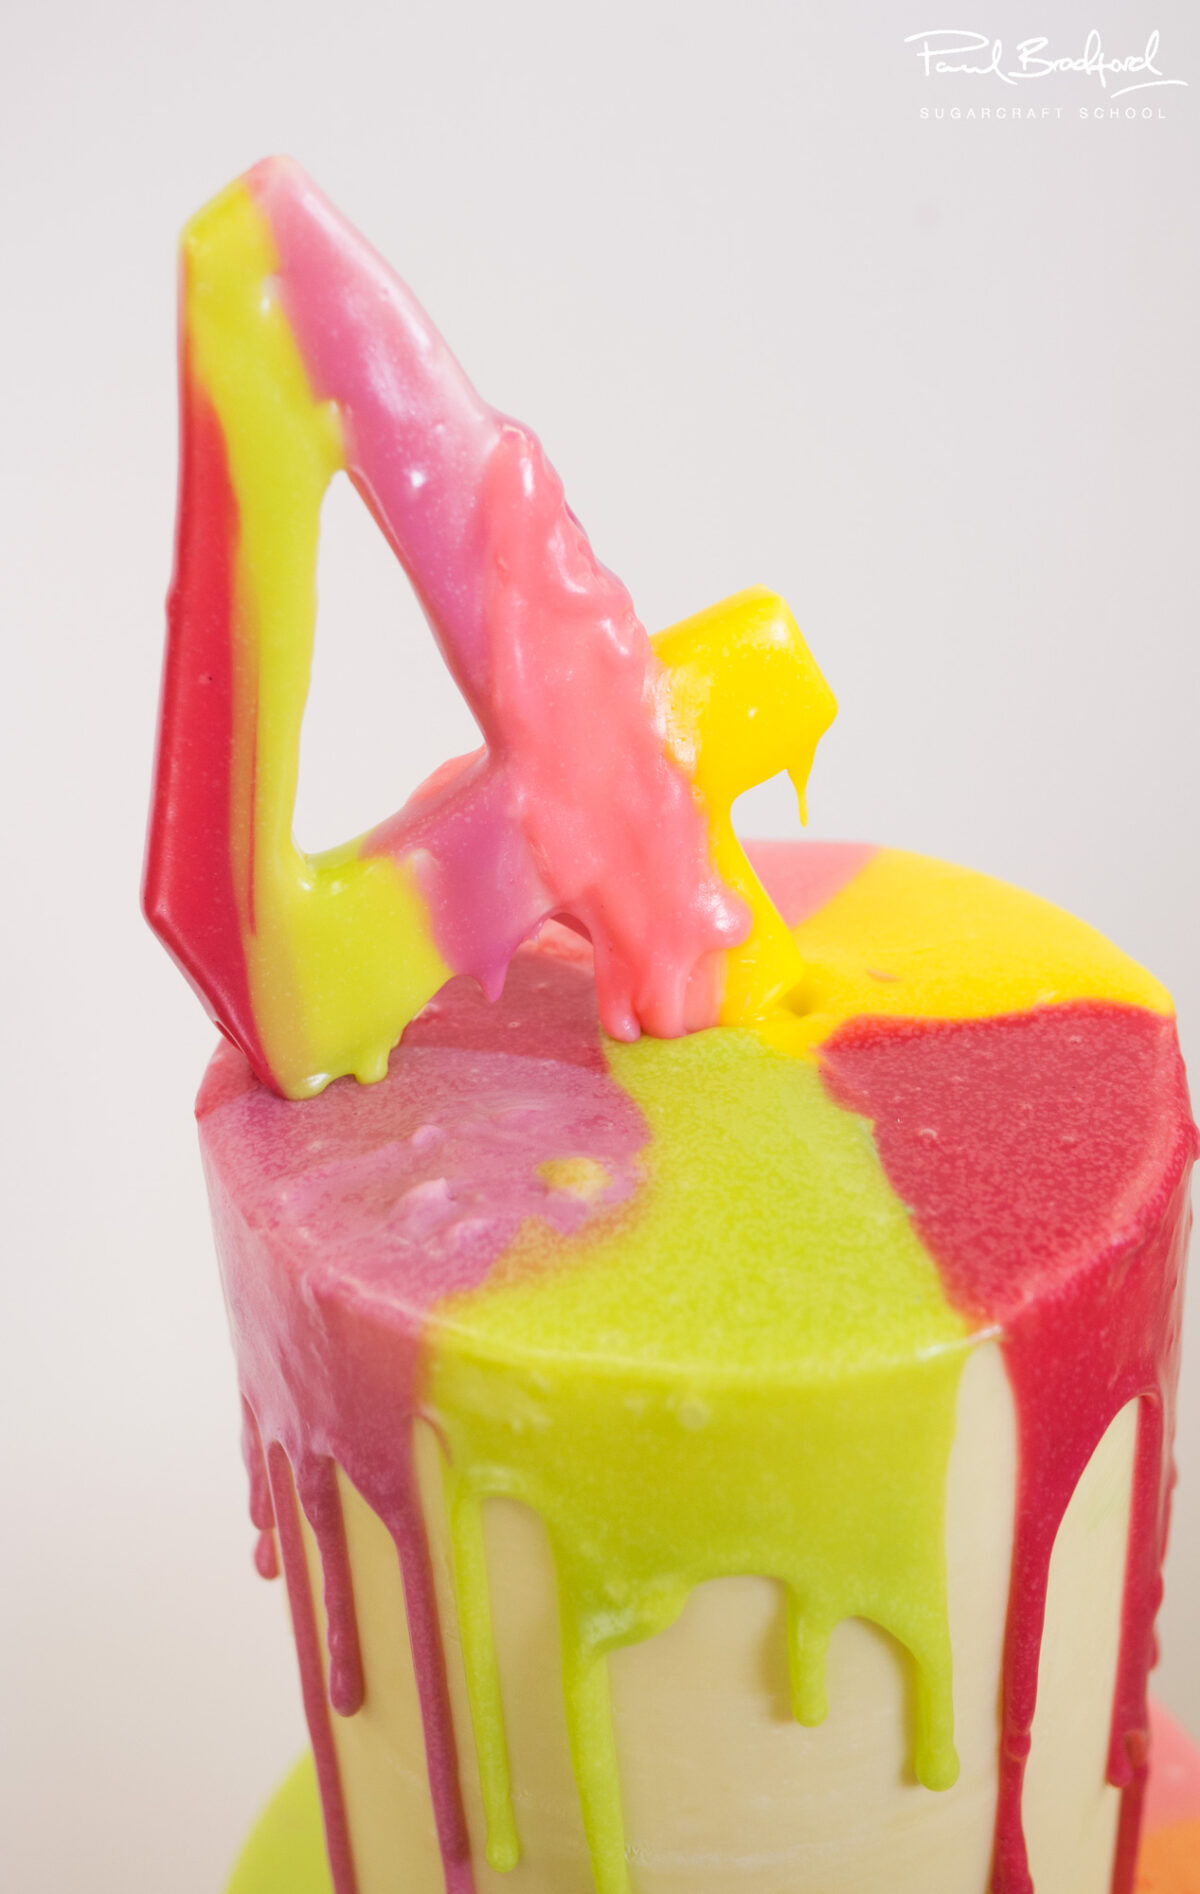
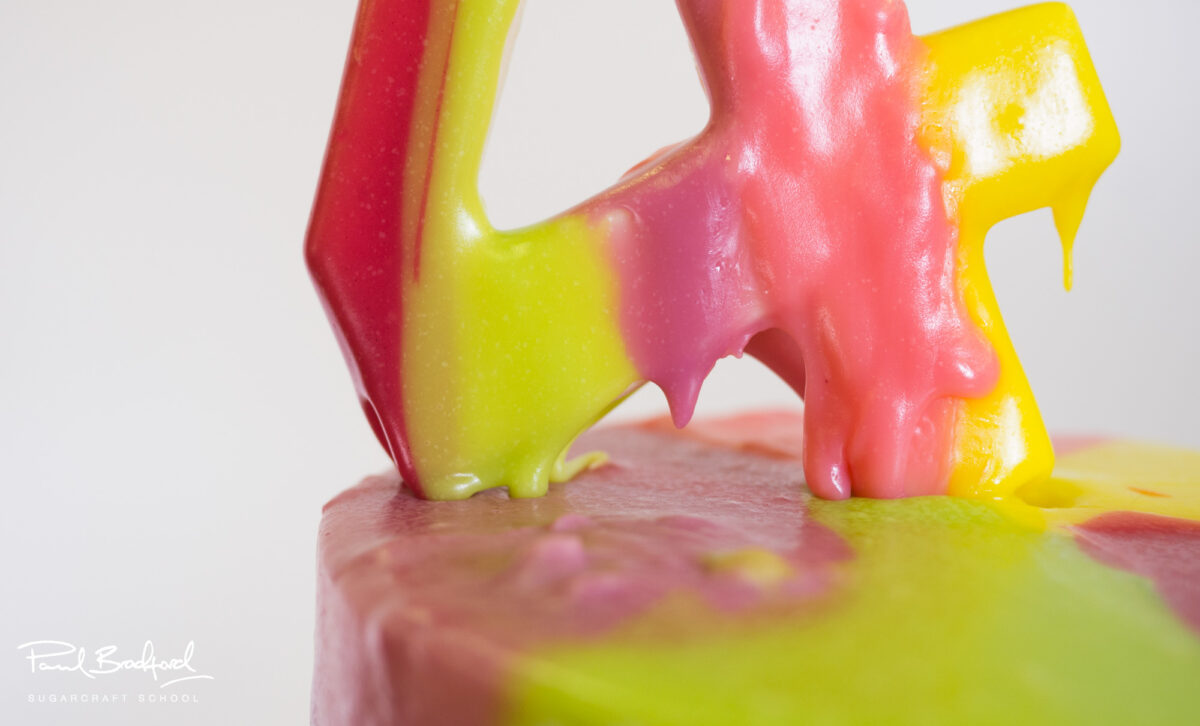
13. Finishing Touches
In this lesson Paul finishes it all off by slightly tweaking the drops of chocolate on the number 4 using a hot palette knife and then inserts it into the cake. I am sure you’ll agree that it looks brilliant! If you want to see it completely finished then wait until you see the next tutorial where we have a secret guest tutor add some models to it! Stay tuned!
14. Other Ideas
Paul shares some other ideas you can implement when making this cake to make it unique to you. We are sure that you have some of your own fantastic ideas too and we would love to see them.
Share your pictures with us on our facebook page.
15. Pro Lesson
In this lesson Paul gives some insider info for this cake including the cost to make it as well as how much you should price the cake at when selling it. Vital information for any professional cake designer.
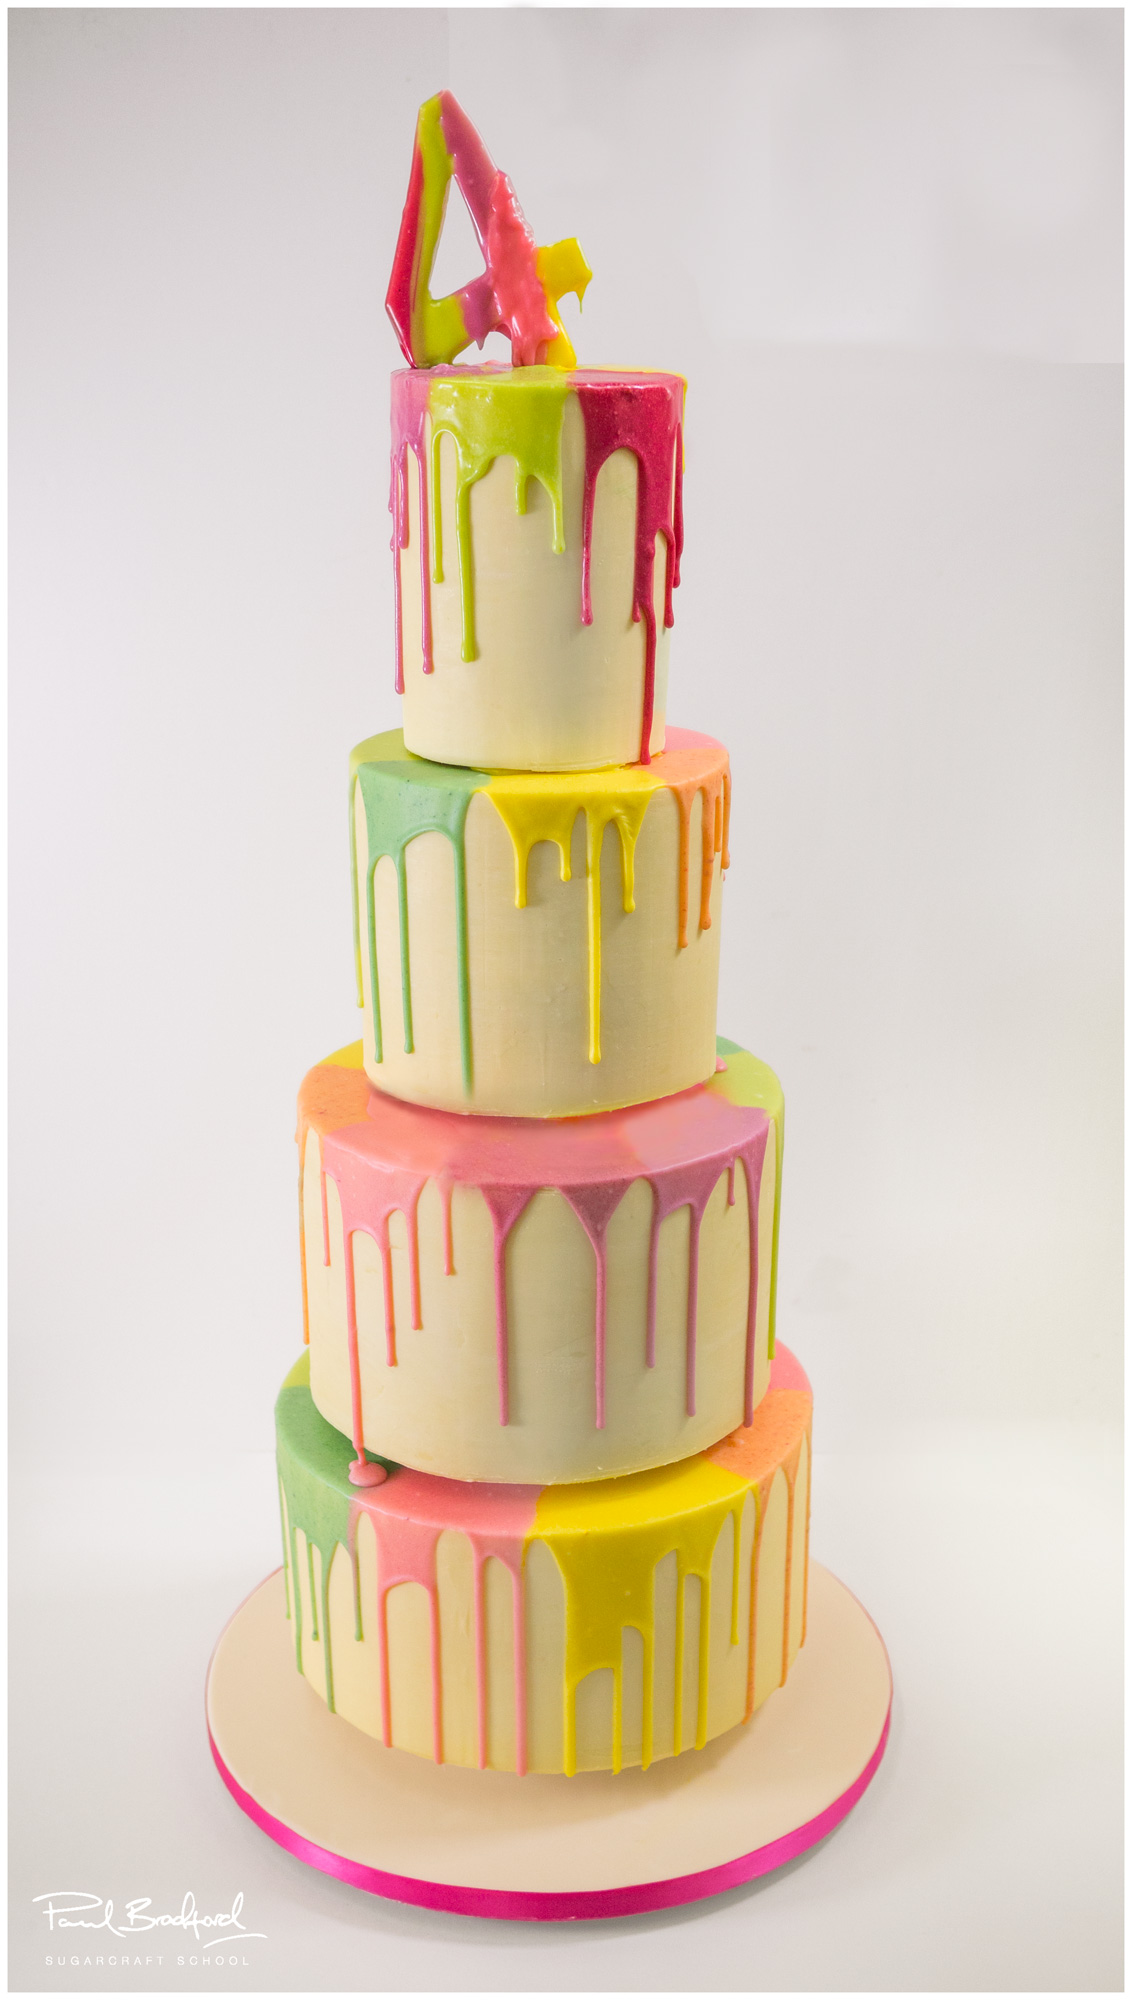
In celebration of four years of the Paul Bradford Sugarcraft School, Paul introduces us to this vibrant, fun and striking Melted Rainbow Cake! This cake can be adapted in so many ways and is perfect for a variety of celebrations, be it a wedding, birthday or indeed an anniversary. Paul had great fun making this and shares some brilliant techniques that can be used time and time again to create perfectly smooth tiers, the playful melted rainbow effect and colourful ‘number four’ topper.
We would love to see your take on the Melted Rainbow Cake – please share your pictures with us on our Facebook page!